11 Must-Try Fall Wood Crafts to Spice Up Your Autumn Décor
Hey there, my DIY besties! Is anyone else as ready for pumpkin spice and all things nice as I am? 🙋♀️ If you're craving that warm, rustic farmhouse vibe in your home this fall, you are in the RIGHT PLACE. I’ve pulled together my ultimate list of 11 Fall Wood Crafts that are absolute must-tries. Get ready for easy tutorials, game-changing tips, and all the shoppable links to make it happen. Let's create some magic together!
HOLIDAYS AND SPECIAL OCCASSIONS
Hey there, my crafting crew! Is anyone else as obsessed with that crisp fall air as I am? 🙋♀️ There’s just something about this season that makes me want to cozy up my home with warm, rustic touches.
And you know me—I live for a good DIY that looks expensive but is totally budget-friendly. So, I’ve rounded up 11 must-try fall wood crafts that will bring that gorgeous farmhouse charm right into your living room. These projects are perfect for a solo crafting night or a fun weekend with the girls!
Ready to get your hands a little messy and create some magic?. This post contains affiliate links. If you make a purchase through these links, I may earn a small commission at no additional cost to you. Thank you for supporting my blog! Let’s go! 🚀
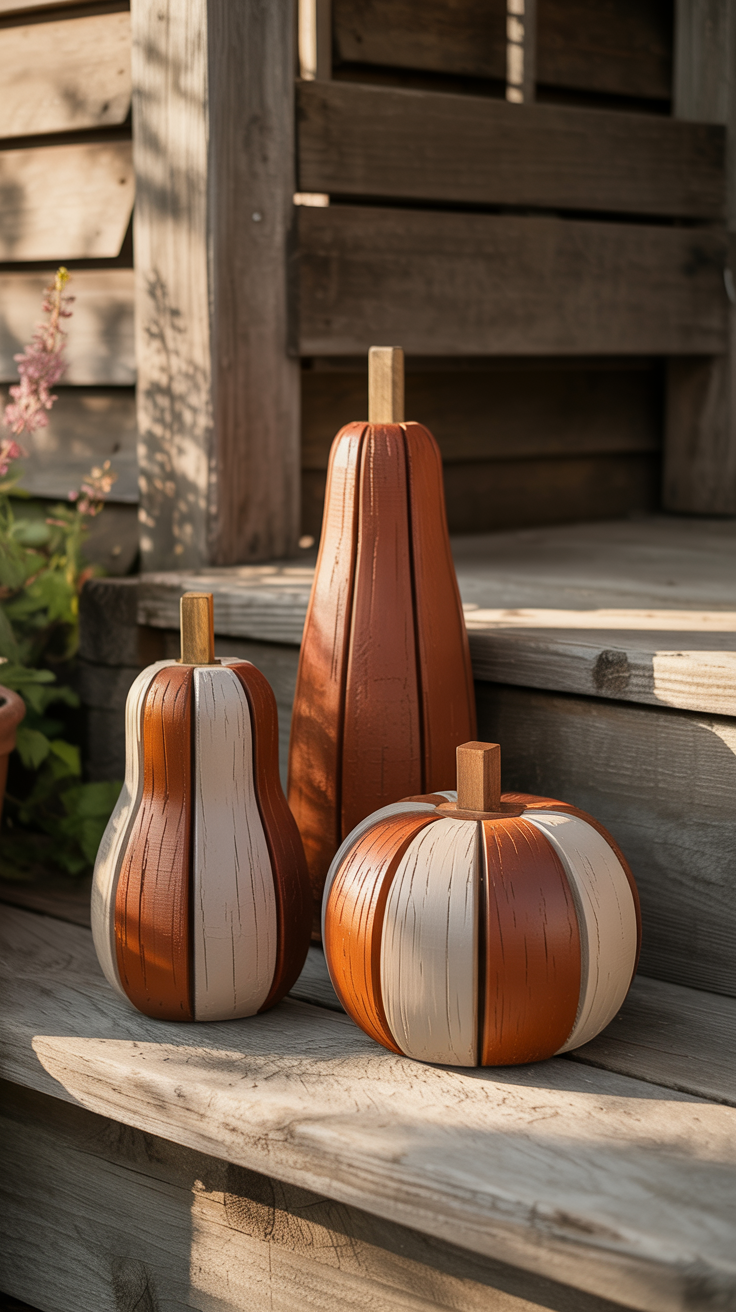

Wooden Pumpkins: Your Ticket to Timeless Fall Décor 🎃
Hey there, creative spirits! If you’re ready to infuse your home with the warm ambiance of fall, wooden pumpkins are your go-to craft. Not only do they exude timeless charm, but they’re also incredibly fun to make. Dive into this engaging DIY and watch as your space transforms into a cozy autumn retreat! Let's walk through how to create these charming wooden masterpieces. 🍁
How to Make Wooden Pumpkins
Materials Needed:
Sandpaper
Paintbrushes
Brown and Green Paint (for stems and leaves)
Step-by-Step Instructions:
Prepare Your Wooden Blocks: Start by selecting wooden blocks of varying sizes to give your pumpkins a more natural look. Sand down any rough edges for a smooth finish.
Carve the Pumpkin Shape: Using your wood carving tools, sculpt the blocks into a rounded, pumpkin-like shape. Don’t stress about perfection—irregular shapes add character!
Painting Time: Apply a coat of orange paint to your carved blocks using a paintbrush. Let the first layer dry before applying a second coat for vibrancy.
Add Details: Use brown paint to create the pumpkin stem at the top. For leaves, a combination of green shades works best. Be creative with your brushstrokes to mimic natural patterns.
Seal Your Work: Once all the paint is dry, apply a layer of Mod Podge sealant to protect your pumpkins and give them a slight shine.
Display with Pride: Arrange your crafted pumpkins on a mantel, along the dining table, or outside on your porch to welcome guests with a touch of handmade warmth.
Embrace the season’s spirit and let your wooden pumpkins showcase your creative flair. This project makes for a perfect weekend activity and adds a delightful personal touch to your fall celebrations! 🎨🍂
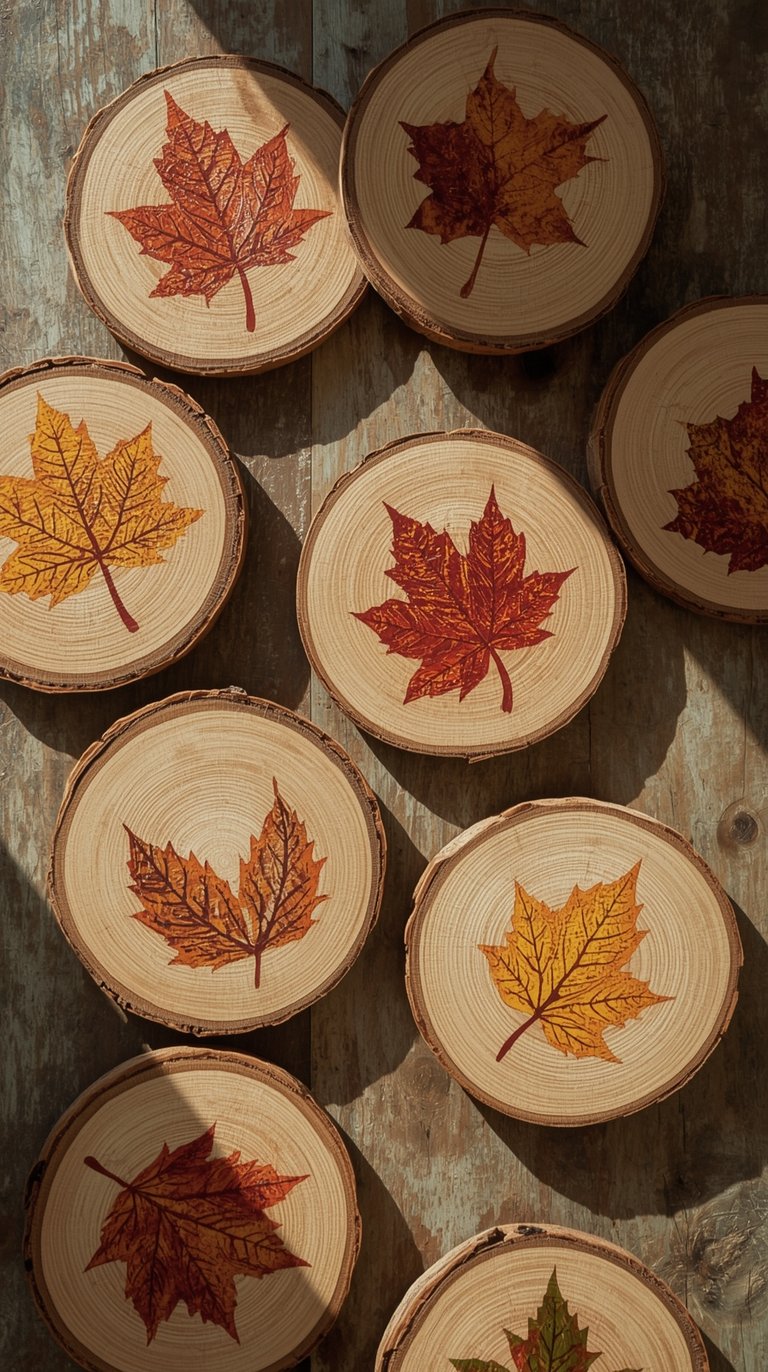
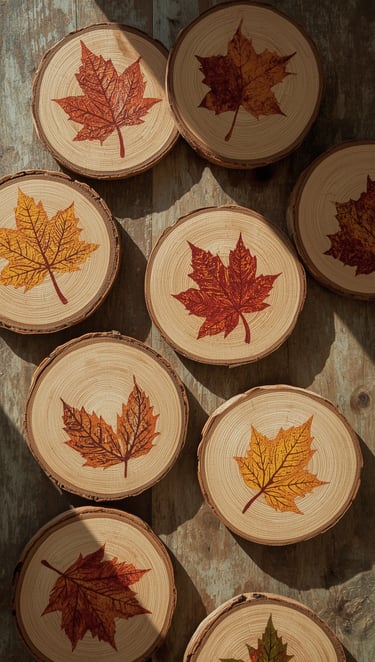
Fall Leaf Coasters: Sip in Style with Nature’s Charm 🍂✨
Let's talk about enjoying your favorite hot beverage in the spirit of autumn. 🍁 Fall leaf coasters are not just functional; they fuse utility with beauty and reflect the season's vibrant colors right under your mugs! Imagine the delight on your guests’ faces when they see these exquisite craft pieces adorning your coffee table. Ready to impress? Let's make it happen!
How to Create Fall Leaf Coasters
Materials Needed:
Fine-tip Paintbrushes
Step-by-Step Instructions:
Pick Your Wood Slices: Lay out your coasters, choosing slices with a smooth and even surface to ensure they’re stable when in use.
Outline Your Leaves: Use a pencil to draw leaf shapes on each wooden slice. This is your opportunity to let creativity flow—maple, oak, or whatever leaf catches your fancy!
Wood Burning for Detail: With your wood burning kit, carefully trace over the pencil outlines. This will give your leaves an elegant, rustic texture.
Add a Splash of Color: Grab your acrylic paints and start filling in the leaf shapes. Feel free to mix colors for a realistic touch. Think shades of gold, red, and orange for that perfect autumn vibe.
Seal for Protection: Once your paint has dried completely, apply a coat of sealing spray. This will not only protect your artwork but also give your coasters a professional finish.
Share the Love: Use your new coasters to add a splash of charm to your daily coffee routine or gift them as thoughtful presents to friends and family.
With just a bit of effort and an eye for design, you can create stunning fall leaf coasters that elevate your home and warm your soul this season. Cheers to crafting and caffeinating in style! ☕🍁

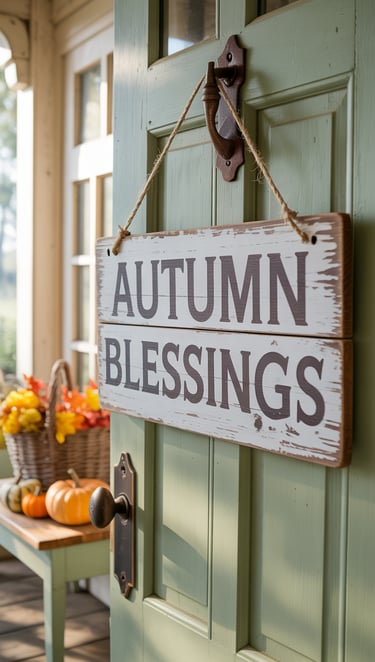
Rustic Wood Signs: Customize Your Fall Message 🌻🌾
Let’s make some magic with rustic wood signs that add a personalized touch to your autumn décor. Whether it’s a warm welcome message at the front door or a cozy quote adorning the living room, wood signs are versatile enough to fit any space or style. Ready to bring your ideas to life? Let’s get crafting with a sprinkle of creativity and a dash of autumn charm! 🍁
How to Create Rustic Wood Signs
Materials Needed:
Fine-grit Sandpaper
Step-by-Step Instructions:
Prepare the Wooden Planks: Start by lightly sanding your wooden planks to ensure a smooth painting surface. Clean off any dust with a dry cloth.
Choose Your Design: Decide on the message or design for your sign. Use stencils to outline letters or intricate designs onto the wood. Stencils are perfect for achieving that polished look without the stress of freehand painting!
Painting Time: Apply chalk paint over the stenciled areas with a paintbrush or sponge applicator. The matte finish of chalk paint pairs beautifully with rustic wood, enhancing its charm.
Add Finishing Touches: Once the paint has dried, gently sand the edges and surface to give it that distressed, vintage look. This adds character and highlights the rustic appeal.
Seal Your Art: Apply a coat of wax sealing finisher to protect your artwork and enhance the color vibrancy.
Hang with Style: Attach rustic twine or ribbon to the top of your sign for easy hanging. This small addition infuses a homey feel and makes your sign ready for display.
Crafting rustic wood signs not only personalizes your space but does so with a uniquely warm touch that only a handmade item can provide. Share your creations with guests as they celebrate fall with you, surrounded by personal touches that chat about creativity and charm.

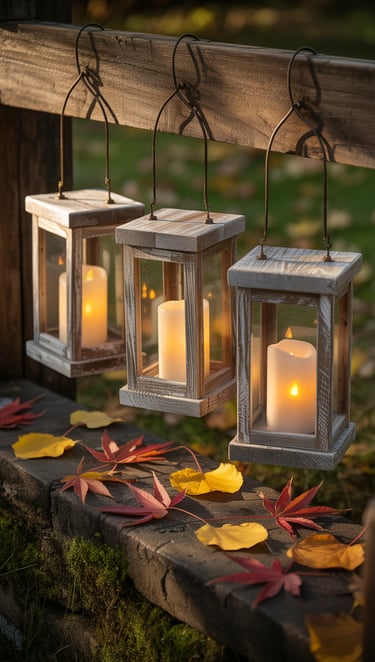
DIY Wood Lanterns: Light Up Your Autumn Evenings with Elegance 🕯️✨
If you're yearning for a touch of warmth and sophistication in your fall décor, DIY wood lanterns are the perfect project. These charming lanterns not only brighten up your space but also make for stunning visual pieces. Imagine a cozy evening lit by your handcrafted designs — a tranquil retreat in your own backyard. Ready to infuse your space with this glowing magic? Let’s get started!
How to Create DIY Wood Lanterns
Materials Needed:
Wood Glue
Saw (for cutting wood)
Sandpaper
Step-by-Step Instructions:
Cut Your Wood Panels: Begin by cutting your wood panels into the desired sizes to form the lantern’s frame. Typically, four pieces for the sides and four smaller pieces for the top and bottom.
Assemble Your Frame: Use wood glue to connect the sides of the frame. Ensure that everything is square and leveled. Once the glue sets, secure the joints with nails or screws for added stability.
Fit the Glass Panels: Measure and cut the glass panels to fit into the frames. Carefully place them inside once the frame is built, securing them with adhesive that is safe for both glass and wood.
Paint and Stain: Apply your choice of stain or weatherproof paint. This not only adds an aesthetic touch but also protects the wood from elements, especially if you're placing your lanterns outdoors.
Add a Hinge-Operated Top: Create a hinged top using smaller wood pieces, allowing for easy access to place or replace LED candles. Attach hinges and attach the lid securely to one side.
Illuminate with LED Candles: Once your lantern is fully assembled and dry, place an LED tea light candle inside. It’s safe, flameless, and offers a warm glow that mimics real candlelight.
Handcrafting these wood lanterns not only enriches your space with personalized elegance but also provides the satisfaction of seeing light born from your creative touch. Enjoy ambient evenings filled with charm and creativity! 🌟

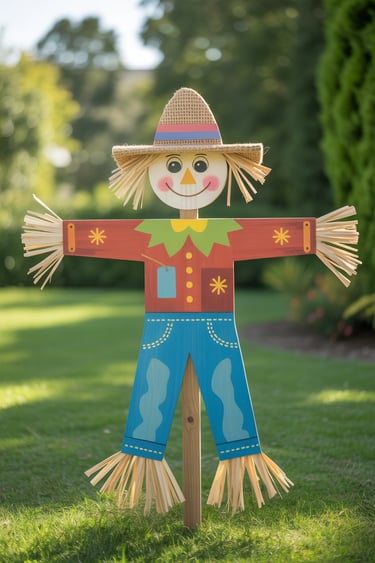
Wooden Scarecrows: Guard Your Garden with Rustic Charm 🌾🌻
Let’s bring some character to your outdoor space with charming wooden scarecrows—a delightful way to showcase your creativity and celebrate the harvest season. These whimsical figures don’t just brighten a garden or porch; they also symbolize protection and abundance. Ready for some fun crafting? Let’s dive in and craft a friendly guardian for your yard!
How to Build Wooden Scarecrows
Materials Needed:
Hammer and Nails
Rope or String
Straw or Raffia for Hair
Old Clothes or Burlap Sacks
Step-by-Step Instructions:
Craft the Body Structure: Start by nailing together two long timber pieces in a cross shape to form the scarecrow's body. Ensure the horizontal piece is fixed securely where the arms should be.
Face the Scarecrow: Cut a circular or oval piece of wood for the head, and nail it into the vertical timber. Use paint to give your scarecrow a cheerful or spooky face—let your personality shine through!
Dress Your Scarecrow: Dress your scarecrow using old clothes or burlap sacks. Secure the clothing with rope or string around the neck and waist to keep them in place during windy days.
Add Hair and Hat: For hair, glue or staple straw or raffia onto the top of the head. Top it off with a hat for extra flair and protection against weather.
Finalize the Look: For added authenticity, tie fabric scraps around the arms and neckline. Paint-on patches or use spare fabric to signify repairs, adding character to your creation.
Position in Your Garden: Place your scarecrow in a visible spot in your garden or on the porch where it can welcome guests and watch over your fall décor with charm.
By crafting a wooden scarecrow, you create a lively garden decorator that adds personality to your space. Celebrate autumn’s harvest vibes with this unique creation, and consider adding a harvest basket or festive wreath to complete the look. 🎃

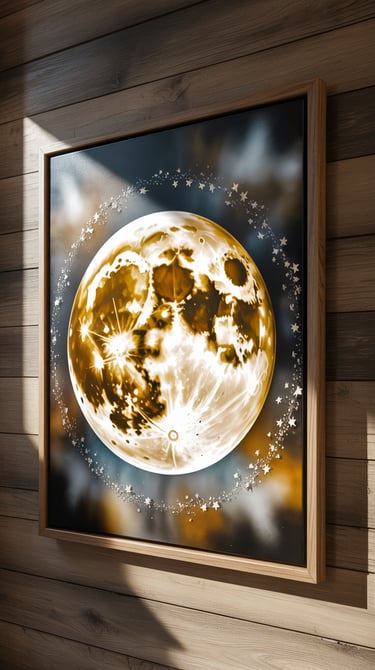
Harvest Moon Wall Art: Embrace the Glow of the Season 🌕✨
Imagine capturing the serene glow of the harvest moon right on your walls. Harvest moon wall art is a remarkable way to celebrate autumn’s mystique and add a touch of elegance to your home. Whether you're decorating a living room or creating a cozy atmosphere in your bedroom, this project will infuse your space with the tranquility of autumn nights. Let’s harness that lunar magic and craft a piece that radiates serenity and beauty! 🎨
How to Create Harvest Moon Wall Art
Materials Needed:
Paintbrushes
White and Yellow Acrylic Paint
Sponge or Stencil Brush
Step-by-Step Instructions:
Prepare Your Wooden Canvas: Start by applying a wood stain to your wooden canvas for a rich background that enhances the colors of your moon art. Allow it to dry completely.
Outline the Moon: Use a circular stencil or a template to draw the shape of the moon on your canvas. Position it where you want the focal point of your art to be.
Paint the Moon: Using a sponge or stencil brush, apply white and yellow acrylic paint to fill in the moon shape. Dab gently to create soft, blended edges that mimic the appearance of moonlight.
Add Details: With a fine brush, add craters and textures for a realistic look. You can use a darker shade of gray or an additional layer of white paint to enhance the depth and shadowing.
Highlight with Stars: Splatter a small amount of diluted white paint across the canvas to create a starry night effect around your moon.
Seal the Artwork: Once your painting is dry, apply a coat of sealer spray to protect your masterpiece and ensure it retains its vibrancy for years to come.
Hang your harvest moon wall art in a location where it will be admired and let it serve as a serene reminder of the beauty and mystery of the night sky. Perfect for adding a personal touch to your fall decorations! 🌜
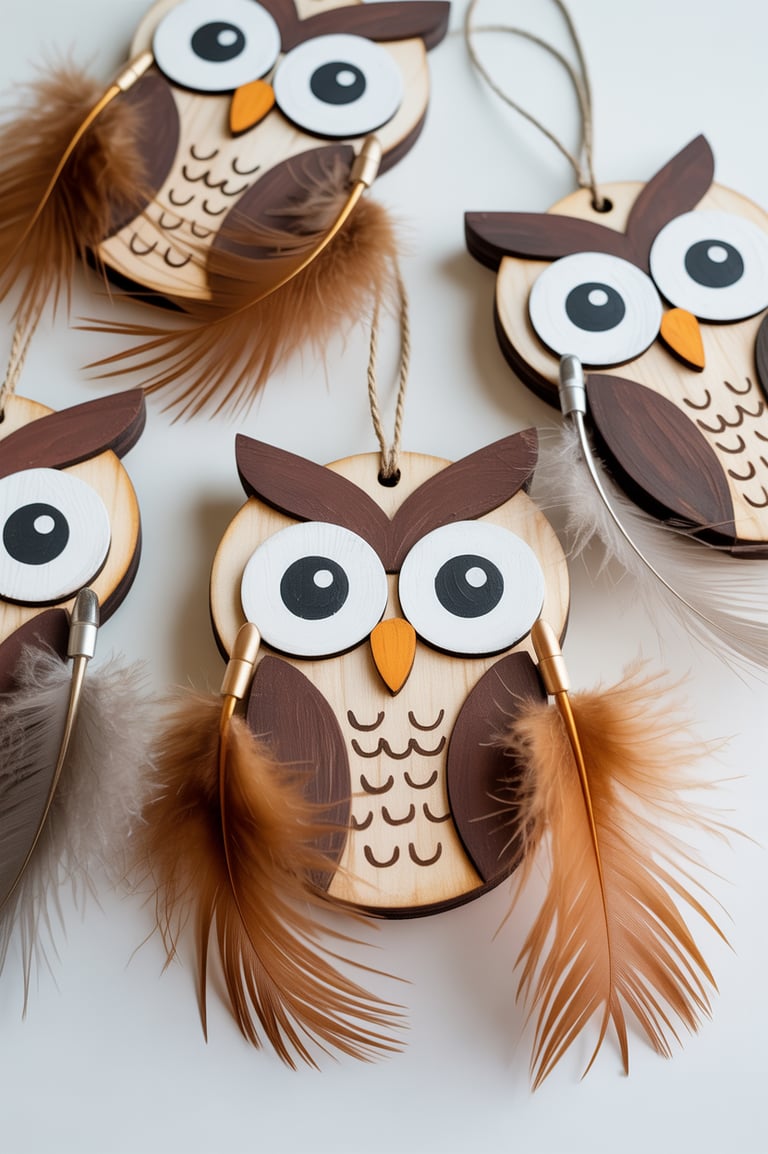
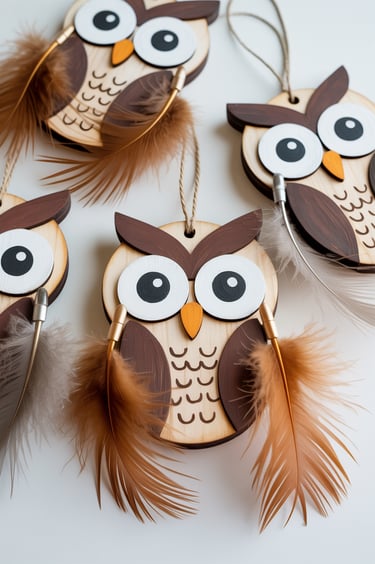
Wooden Owl Ornaments: Adorn Your Space with Whimsical Charm 🦉✨
Wooden owl ornaments are a delightful way to bring a touch of whimsy to your fall decorations. These charming creatures add a playful yet sophisticated vibe to any room, making them perfect for the season. Whether they hang on your walls or sit atop your shelves, these little owls are sure to capture hearts. Let’s dive into crafting these enchanting ornaments! 🌳
How to Create Wooden Owl Ornaments
Materials Needed:
Acrylic Paint
Fine-Tip Paintbrushes
Sandpaper
Step-by-Step Instructions:
Prepare the Wooden Base: Lightly sand the wooden owl ornaments to ensure a smooth surface for painting. Wipe away any dust with a clean cloth.
Paint the Owls: Using acrylic paint, carefully craft the facial features and feathers of your owls. Let your creativity lead with color choices to match or contrast your décor.
Add Texture with Feathers: Once the paint dries, use a hot glue gun to attach crafting feathers to give your owls a realistic texture. Place them strategically to accentuate the wings or head.
Detail the Eyes: Paint on the eyes or use small craft embellishments for added detail. The eyes are the focal point, so make them stand out!
Seal for Durability: Apply a coat of varnish or sealer to protect your ornaments and ensure they last for seasons to come.
Display Creatively: Use strings to hang them or prop them against window sills and bookshelves. Consider showcasing them in groups for a beautiful forest effect.
Bring a dash of enchantment to your autumn displays with these wooden owl ornaments, and let them be a conversation starter among family and friends. 🍂
Pallet Wood Turkey: A Festive Guardian for Your Space 🦃🍁
Transform pallet wood into an eye-catching turkey decoration that stands proudly as a centerpiece for your fall celebrations. This recycled project is not just eco-friendly but a fantastic way to showcase your DIY skills and enhance the festive atmosphere. Ready to build your feathered friend? Let’s go!
How to Create a Pallet Wood Turkey
Materials Needed:
Saw
Hammer and Nails
Paintbrushes
Sandpaper
Step-by-Step Instructions:
Disassemble the Pallet: Carefully take apart the pallet wood using a saw or pry bar. Sand each piece to smooth out rough edges and surfaces.
Construct the Turkey Shape: Arrange the wood pieces to form the body and feathers of the turkey. Secure them with wood glue, nails, or both for sturdiness.
Paint and Personalize: Use outdoor paint to bring your turkey to life with vibrant fall colors. Paint each piece to represent wings, tail feathers, and body. Let your artistic flair fly!
Include Details: Use additional wood pieces for the turkey’s head, beak, and eyes. Add unique elements like painted patterns or embellishments for personality.
Secure and Display: Once the paint is dry, position your turkey where it best suits your yard or porch setting and anchor it securely.
Celebrate your creativity with this pallet wood turkey, charming enough to bring smiles and robust enough to withstand autumn breezes. 🦃


Apple Crate Display: Showcase Season’s Bounties with Rustic Elegance 🍏🍂
If you’re looking for a stylish way to display your autumn finds, apple crates are your new best friends. With their rustic appeal, these crates can be stacked, painted, and arranged to create beautiful displays for fall. Perfect for homes, gardens, or porches! Dive into this delightful project and let your bountiful spirit shine.
How to Create an Apple Crate Display
Materials Needed:
Sandpaper
Paintbrush
Decorative Accents (such as faux leaves or mini pumpkins)
Step-by-Step Instructions:
Prepare Your Crates: Start by sanding down any rough areas on your crates. This gives a smooth finish for painting and waxing.
Paint or Stain the Crates: Decide on a color scheme—whether natural wood tones or a vibrant autumn palette. Use spray paint or a brush for more detailed work. Allow to dry completely.
Wax for Finish: Apply furniture wax to enhance durability and boost the visual appeal of your crates.
Stack and Arrange: Place the crates in your chosen location, and stack them in an artistic arrangement that suits your space.
Fill with Décor: Add decorative accents like gourds, dried leaves, or seasonal fruits to create a visually appealing display.
Personalize: Insert personal touches such as photos, DIY signs, or additional decorations that reflect your style and the season's spirit.
Use these apple crates to transform simple corners into stunning seasonal features and let your decor speak of elegance and warmth. 💫our creativity with this pallet wood turkey, charming enough to bring smiles and robust enough to withstand autumn breezes. 🦃
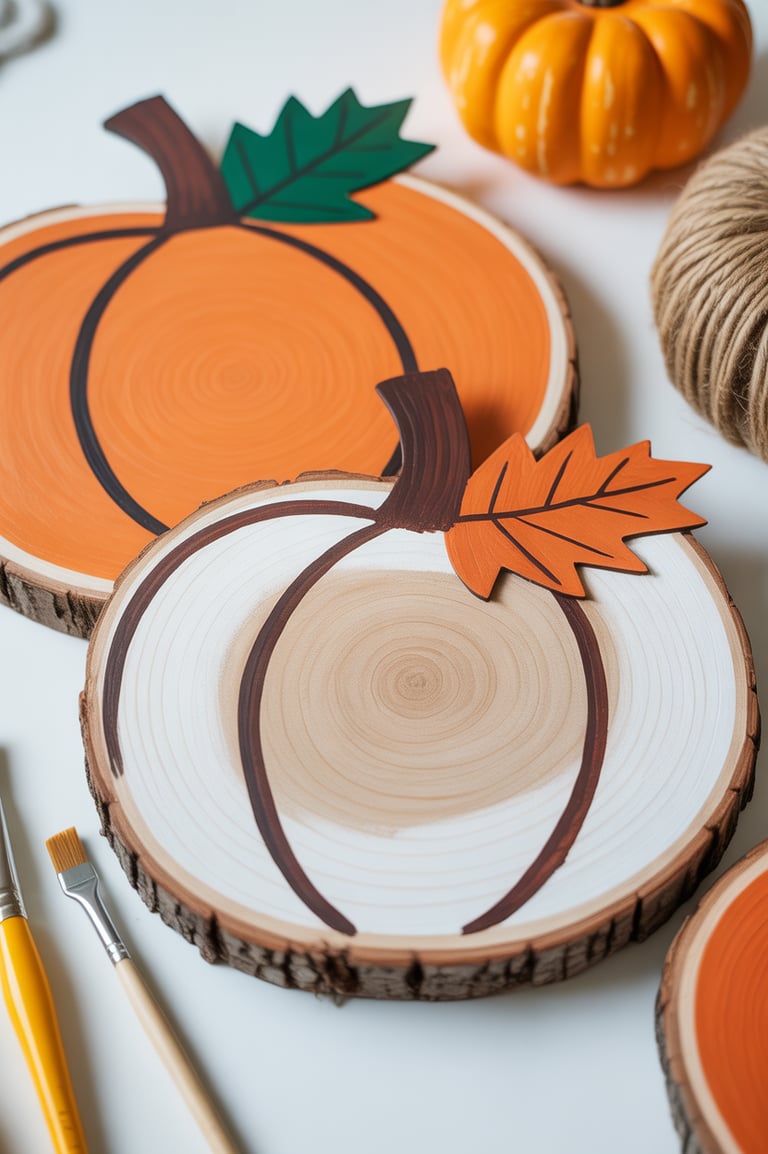
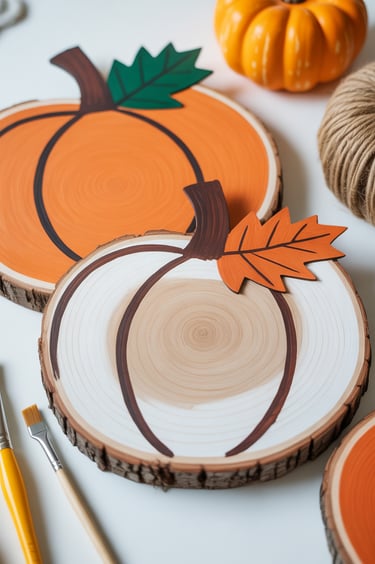
Wood Slice Pumpkins: A Rustic Twist on an Autumn Classic 🎃🍂
Wood slice pumpkins are the perfect blend of simplicity and elegance, offering a unique alternative to traditional pumpkin decorations. Their minimalistic design is effortless yet impactful. Ready to roll up your sleeves for this enticing craft? Let’s make some not-so-scary pumpkins!
How to Craft Wood Slice Pumpkins
Materials Needed:
Paintbrushes
Sandpaper
Crafting Leaves or Twine
Step-by-Step Instructions:
Prepare Your Wood Slices: Sand the surfaces lightly to remove any rough patches which could hinder painting.
Paint Your Pumpkins: Use different shades of orange, white, or any fall-inspired palette to paint the wood slices entirely or just highlight pumpkin features.
Add Stem and Details: Use brown paint for stems and consider attaching faux leaves or wrapping twine around to enhance the rustic charm.
Seal the Surface: Apply a clear brush-on sealant to protect the paint and give your artwork a polished finish.
Showcase Your Harvest: Display these charming wood slice pumpkins on mantles, tables, or even as part of a centerpiece to celebrate the season.
Bring an inviting rustic touch to your home with these delightful pumpkins, perfect for crafting sessions with family and friends! 🎃


Hanging Wood Bats: Batty About Halloween Decor 🦇🎃
Let’s get a little spooky with some hanging wood bats, ideal for setting the Halloween mood around your home. These nifty decorations are straightforward yet eerily effective in giving your space that haunted, festive feel. So grab your crafting kit and let’s conjure up some magic!
How to Make Hanging Wood Bats
Materials Needed:
Saw for Cutting Shapes
Drill
Sandpaper
Step-by-Step Instructions:
Cut Out Bat Shapes: Sketch and cut out bat shapes from the wood sheets using a saw. Adjust the size to fit your desired aesthetic.
Smooth the Edges: Sand the edges and surfaces to ensure there are no rough spots that detract from your bats.
Paint Your Bats: Use waterproof paint in black or other dark shades to coat your wooden bats. This ensures they hold up well even if displayed outdoors.
Drill and Attach String: Drill small holes at the top of each bat, and thread through string or wire to create hangers.
Hang Creatively: Position these bats in places where they can dangle freely, such as porch awnings, tree branches, or even inside leading to themed gatherings.
Add a whimsical and slightly eerie touch to your Halloween décor with these hanging wood bats—perfect for thrilling your guests and embracing the spooky season! 🎃
final thoughts
I hope you’re feeling inspired and ready to transform your spaces with these unique handmade touches. Whether you’re adding whimsy with wooden owl ornaments, lighting up your evenings with DIY lanterns, or bringing rustic charm with wooden scarecrows, each project is a testament to your creativity and love for the season. The beauty of DIY is that it allows you to express something personal—little stories that speak to your home and heart.
Let these crafts not only beautify your space but also become moments of joy and gathering with friends and family. So go ahead, enjoy the process, make it yours, and let your home be the cozy, welcoming haven that echoes the enchanting essence of autumn.
Happy crafting, and may the season bring you warmth and joy! 🍁✨