15 DIY Christmas Ornaments That Look Expensive (But Are Easy to Make!) 🎄✨
🎄✨ Dive into the world of DIY Christmas ornaments . This guide shows you how to create stunning ornaments that look straight from a designer catalog without the hefty price tag. From rustic wood slices to glamorous sequin balls, each project offers a step-by-step approach to crafting beautiful, personalized decorations perfect for your holiday theme. Whether you’re aiming for farmhouse charm or modern chic, these creations promise an enjoyable crafting experience, make wonderful gifts, and bring a magical sparkle to your festive décor. Let's make your holiday unforgettable!
HOLIDAYS AND SPECIAL OCCASSIONS
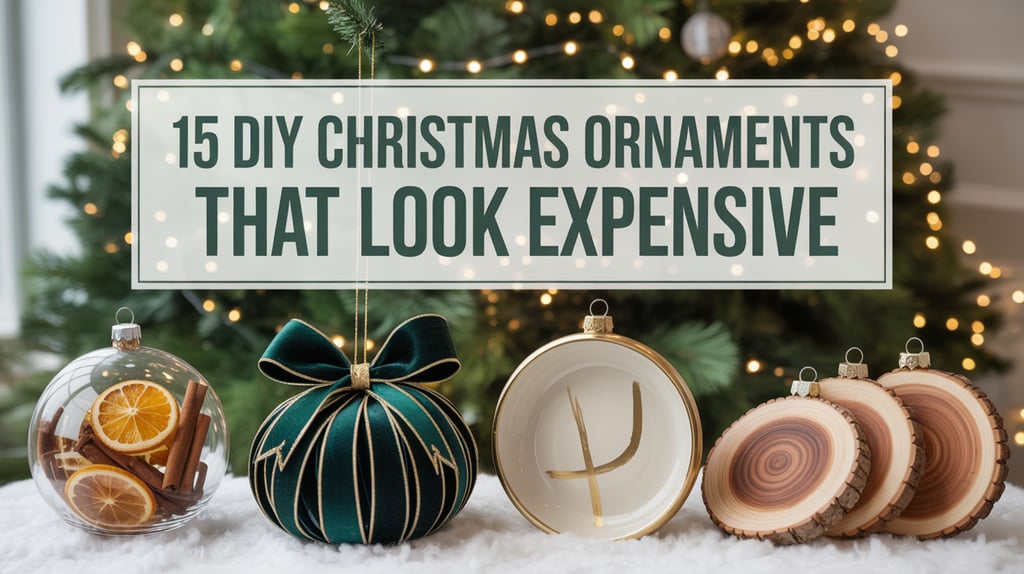

🎄✨ Let’s be real: every year the stores are stocked with gorgeous, sparkly Christmas ornaments that make us swoon… until we peek at the price tag. 😅 But here’s the good news: you don’t need a big budget to get that designer tree look you’ve been eyeing. With a little creativity (and a sprinkle of glitter ✨), you can DIY ornaments that look straight out of a high-end holiday catalog.
The best part? These projects aren’t just budget-friendly—they’re fun, giftable, and totally Pinterest-worthy. Whether you love glam golds, rustic farmhouse vibes, or modern minimal chic, I’ve rounded up 15 DIY Christmas ornaments that look expensive but are easy enough for anyone to make.
💡 Pro tip: Before you dive in, grab a few essentials like clear fillable ornaments, faux snow, velvet ribbon, Mod Podge, and a hot glue gun (my holiday must-haves). Having the right supplies on hand makes these DIYs a total breeze.
✨ Don’t worry if you’re new to crafting—no special skills are required. Most of these can be made in just 10–20 minutes, and each one comes with simple step-by-step instructions. Plus, many of them cost under $5 each to make (way less than the $25 ornaments you see at the store). ✨🥰 This post contains affiliate links. If you make a purchase through these links, I may earn a small commission at no additional cost to you. Thank you for supporting my blog!
So grab your cocoa, cue the holiday playlist 🎶, and let’s create a Christmas tree that looks like it belongs in a magazine—without spending a fortune.
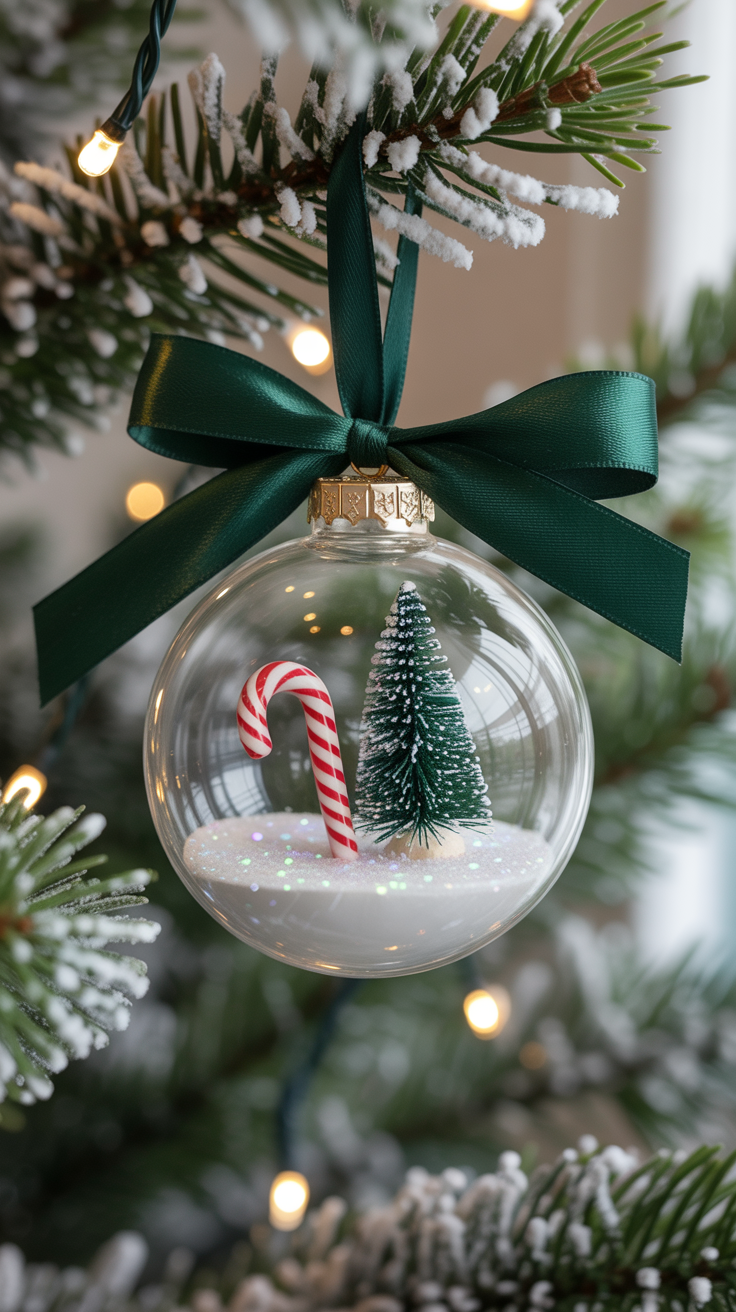
Clear Glass Ornaments with Faux Snow ✨
Why You’ll Love It
This ornament is a classic for a reason! It gives your tree a delicate, high-end look that seems straight out of a boutique store. The best part? It’s fully customizable—you can add glitter, tiny trees, pinecones, or even a small family photo. It’s also incredibly beginner-friendly, requiring no special tools or skills.
What You’ll Need
Clear fillable glass or plastic ornament
Faux snow or glitter
Ribbon or twine for hanging
Optional: tweezers to arrange mini items
Step-by-Step Tutorial
Carefully remove the top cap of your ornament.
Fill the ornament with a layer of faux snow or glitter—about 1/4 to 1/3 full works best.
Add tiny items like mini trees, pinecones, or beads. Use tweezers to arrange them neatly if needed.
Replace the top cap and tie a ribbon or twine around the top for hanging.
Optional: add a tiny dab of glue to keep items in place if you want them to be more secure.
Pro Tips & Variations
Mix white faux snow with a touch of glitter for extra sparkle.
Choose mini items that match your color scheme—metallics look especially luxe.
Make a set with different fills—some with trees, some with glitter, and some with tiny pinecones—for a cohesive but dynamic tree look.
Personalize it by slipping in a small name tag or date for a meaningful gift.
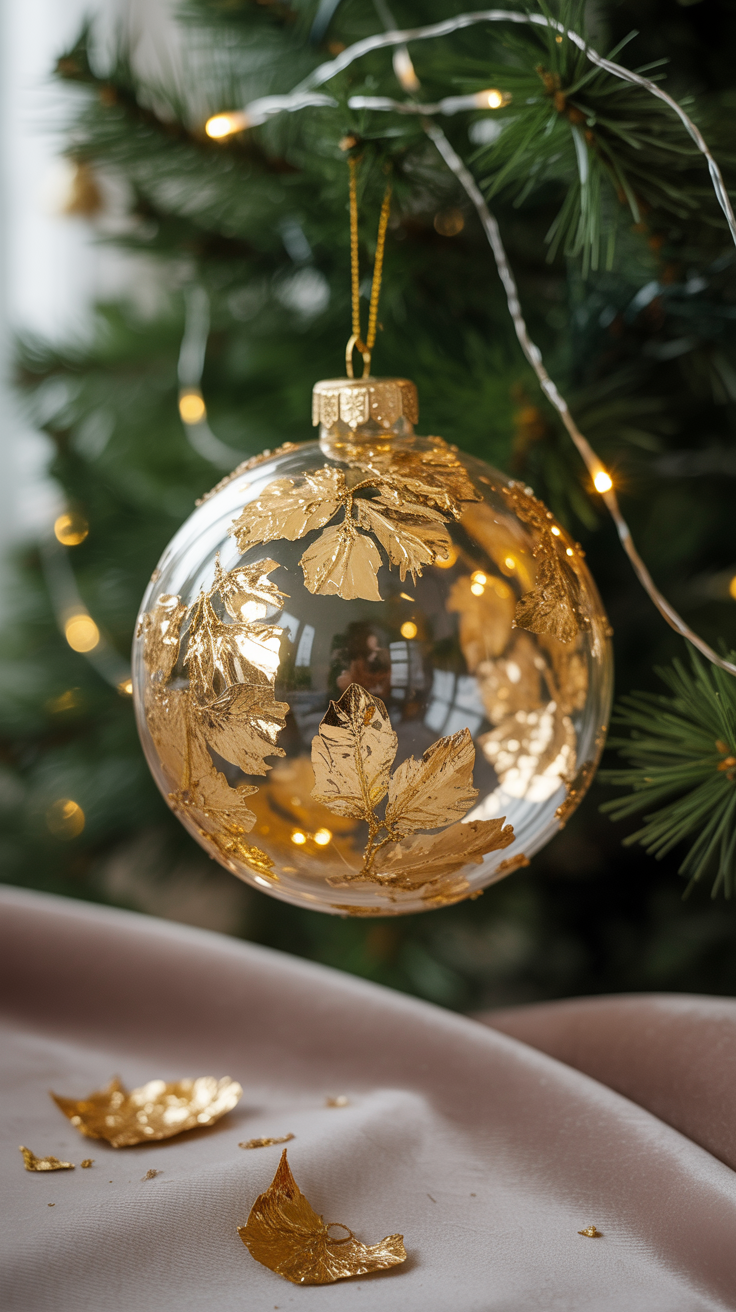

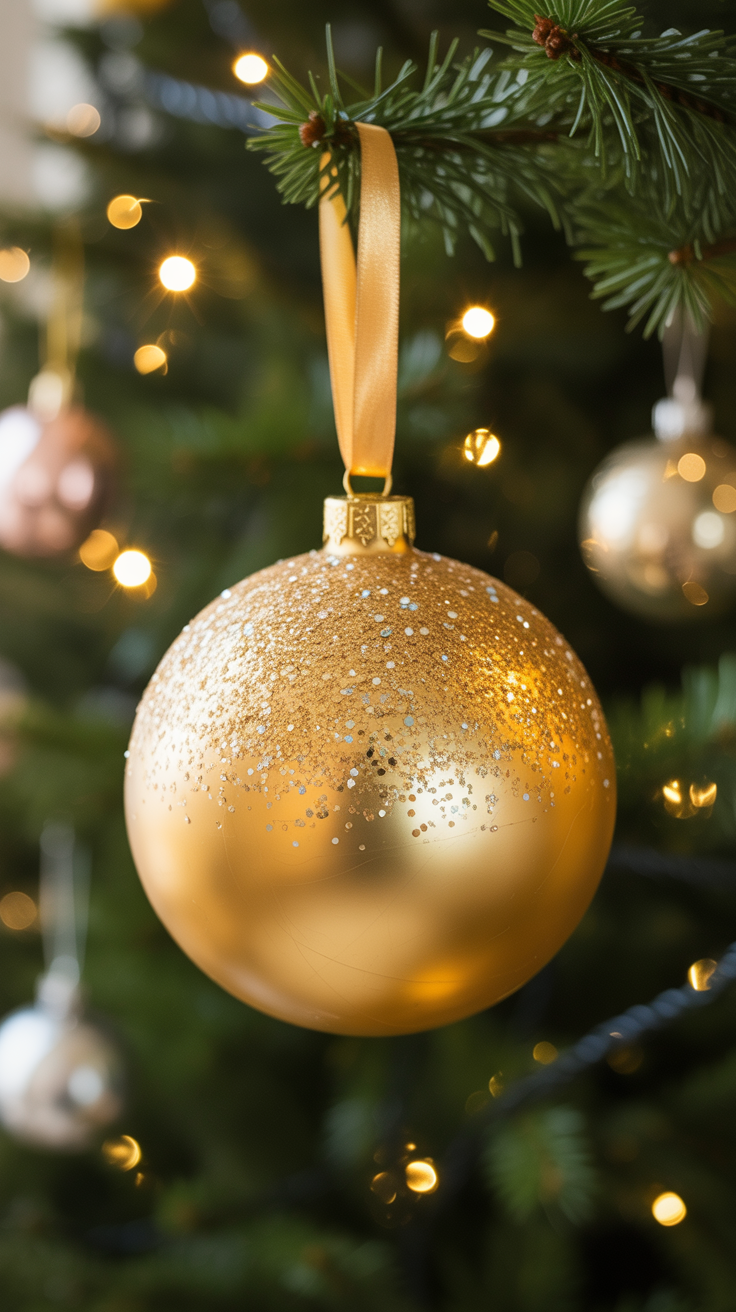
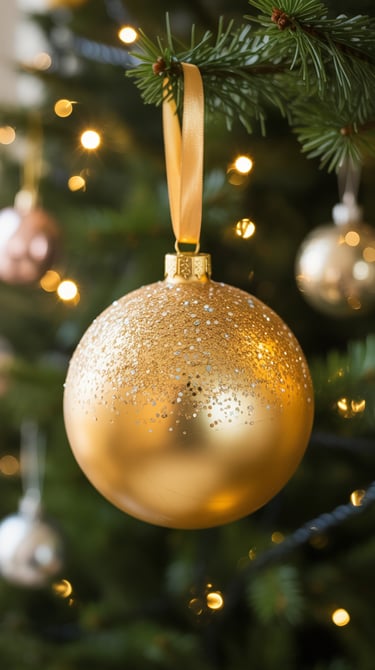
Gold Leaf Ornaments ✨
Why You’ll Love It
Gold leaf instantly elevates anything it touches—it’s that little touch of luxury that makes an ornament look like it came from an upscale boutique. These ornaments shimmer beautifully on the tree and catch the light in the prettiest way. Plus, they’re surprisingly easy to make, even if you’ve never worked with gold leaf before.
What You’ll Need
Gold leaf sheets or flakes
Mod Podge or adhesive suitable for gold leaf
Sealer spray or clear acrylic spray (optional, for durability)
Step-by-Step Tutorial
Start by applying a thin layer of Mod Podge or adhesive to the outside of the ornament with a brush.
Gently press pieces of gold leaf onto the sticky surface. Don’t worry if it tears or overlaps—it adds to the luxe, organic look.
Continue until you’ve covered as much of the ornament as you like. You can go for a full metallic finish or a scattered, artistic effect.
Once dry, lightly brush away excess flakes.
Optional: seal with a clear acrylic spray for extra durability.
Pro Tips & Variations
For a chic two-tone look, only cover half the ornament with gold leaf and leave the other half clear or painted.
Mix gold and rose gold leaf for a trendy, glamorous vibe.
Pair these with simple matte ornaments to let them shine as the star of your tree.
These make stunning gift ornaments—tie them onto wrapped presents for a fancy touch.

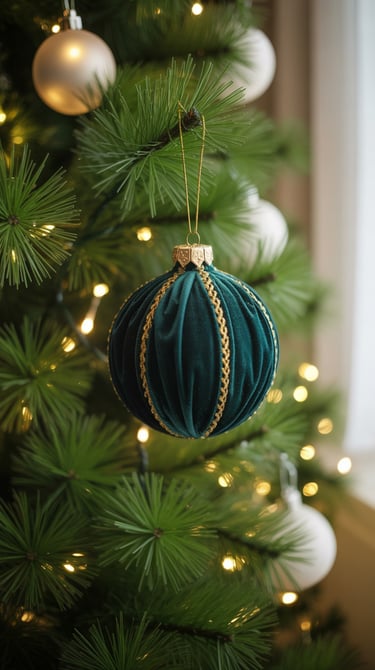
Velvet Wrapped Ornaments 💎🎀
Why You’ll Love It
Velvet has that soft, luxurious texture that instantly feels expensive. Wrap it around a simple ornament, and suddenly your Christmas tree looks like it came straight out of a designer holiday catalog. Plus, you can choose any color to match your holiday theme — from classic red to deep emerald or even blush pink.
What You’ll Need
Plastic or foam ornaments (cheap and lightweight!)
Velvet fabric (scraps work perfectly)
Hot glue or fabric glue
Scissors
Step-by-Step Tutorial
Cut a square of velvet large enough to cover the entire ornament.
Place the ornament in the center and gather the fabric at the top like a pouch.
Secure with a dab of glue to hold the fabric in place.
Tie a ribbon or metallic cord around the top to finish it off.
Trim any excess fabric so it looks neat and polished.
Pro Tips & Variations
Try jewel-toned velvet for a luxe, moody look or blush/pastel velvet for a softer, modern vibe.
Add a pearl or rhinestone pin at the ribbon knot for a glamorous touch.
Want a more modern look? Wrap only half the ornament in velvet and leave the rest painted or glittered.

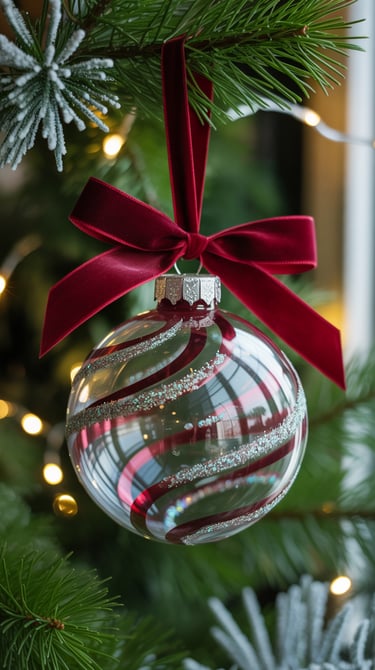
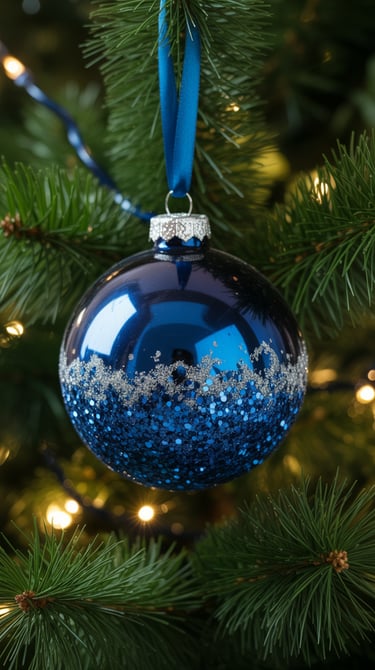
Custom Glass Baubles (Painted or Filled) 🎨✨
Why You’ll Love It
Glass baubles are like blank canvases for your creativity. You can paint them, fill them, or even add glitter inside — each one becomes a unique, personalized ornament. The best part? They look like something you’d buy from a high-end Christmas boutique, but you can make them at home for just a couple of dollars each.
What You’ll Need
Clear glass or plastic ornaments (you can grab a pack at any craft store)
Acrylic paint or metallic spray paint
Small funnel (for filling)
Ribbons or decorative hooks
Step-by-Step Tutorial
Remove the metal top from the clear bauble.
If painting, pour a small amount of acrylic paint inside, swirl it around, then let it dry upside down.
If filling, use a funnel to add glitter, snow, or mini decorations inside.
Replace the top once dry/filled.
Add a ribbon or decorative hook to complete the look.
Pro Tips & Variations
Metallic paint inside creates that “mirrored” ornament look you see in luxury stores.
Fill with family photos, mini pinecones, or dried flowers for a personal touch.
Mix paint and glitter for a two-tone shimmer effect that catches the lights on your tree beautifully.


Macramé Mini Ornaments 🪢✨
Why You’ll Love It
Macramé isn’t just for wall hangings — tiny knotted ornaments can bring a cozy, handmade touch to your tree. They look intricate and expensive, yet they’re surprisingly easy to make with just some cord and basic knots. These are perfect if you love a modern boho or neutral holiday aesthetic.
What You’ll Need
Small wooden beads (optional, for extra charm)
Scissors
Hot glue (optional, to secure knots)
Ribbon or twine for hanging.
Step-by-Step Tutorial
Cut a piece of cord about 12–18 inches long (depending on your desired ornament size).
Tie a simple knot at the top to create a loop for hanging.
Use basic macramé knots like the square knot or half knot to create a small pattern.
Thread in beads if desired, spacing them evenly along the design.
Trim the ends neatly and secure knots with a dab of glue if needed.
Attach a ribbon or twine through the loop to hang on your tree.
Pro Tips & Variations
Use natural cord colors for a minimalist look, or dyed cord for a festive pop.
Make small sets in matching or complementary colors for a cohesive tree.
Add tiny metallic charms or bells at the bottom for movement and sparkle.
Find your frosty inspiration and download a beautiful macrame snowflake pattern on Etsy today
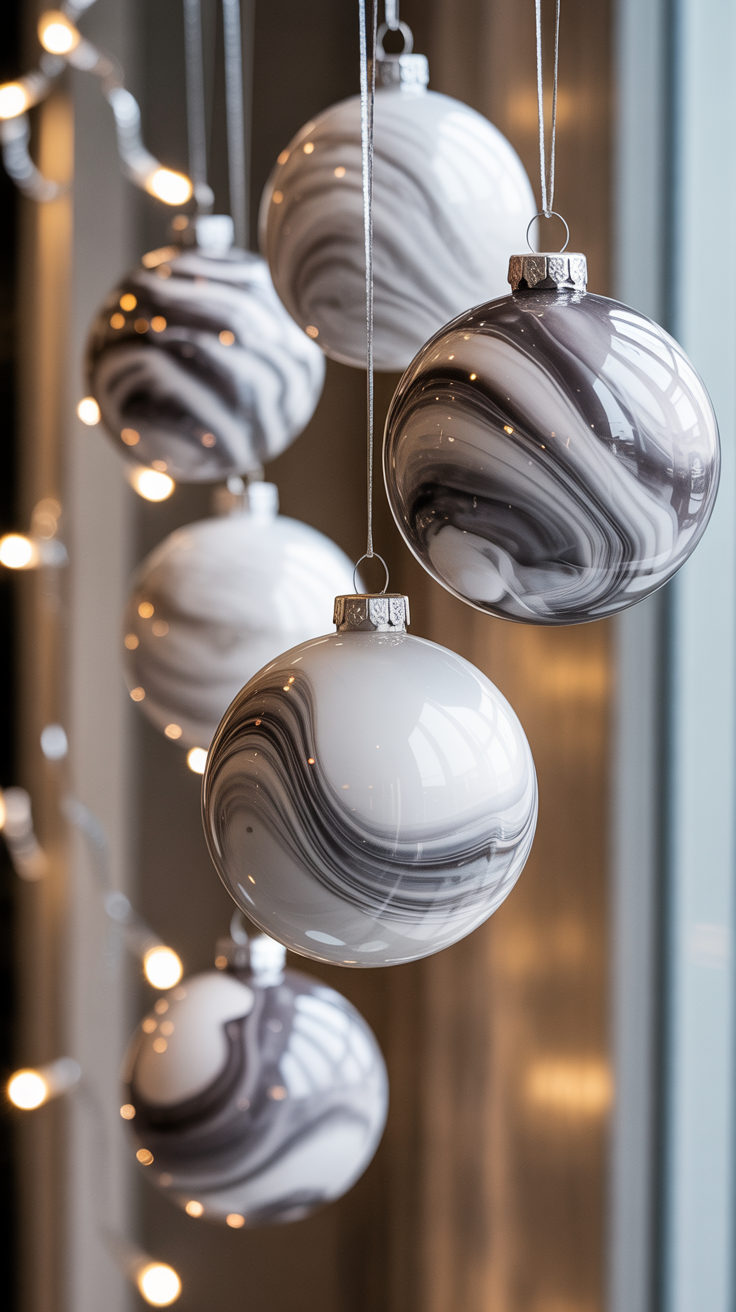

Marble Effect Ornaments 🖌️✨
Why You’ll Love It
Marble-effect ornaments have that chic, modern look that instantly feels high-end. Swirled paint creates a one-of-a-kind design on every ornament, making your tree look sophisticated and unique — all without spending a fortune. They’re perfect for contemporary or minimalist holiday décor.
What You’ll Need
Acrylic paint in 2–3 complementary colors
Small disposable cups or a palette
Toothpick or skewer for swirling
Ribbon or twine for hanging.
Step-by-Step Tutorial
Remove the ornament’s top cap.
Pour small amounts of paint into the ornament, layering colors as desired.
Use a toothpick or skewer to gently swirl the paint inside, creating a marble effect.
Let the ornament dry upside down for several hours.
Replace the top and attach a ribbon or twine for hanging.
Pro Tips & Variations
Metallic paints like gold, silver, or copper give a luxe, holiday-ready vibe.
Try using translucent paints for a softer, frosted marble effect.
Mix in a tiny bit of glitter for added sparkle when the light hits your tree.
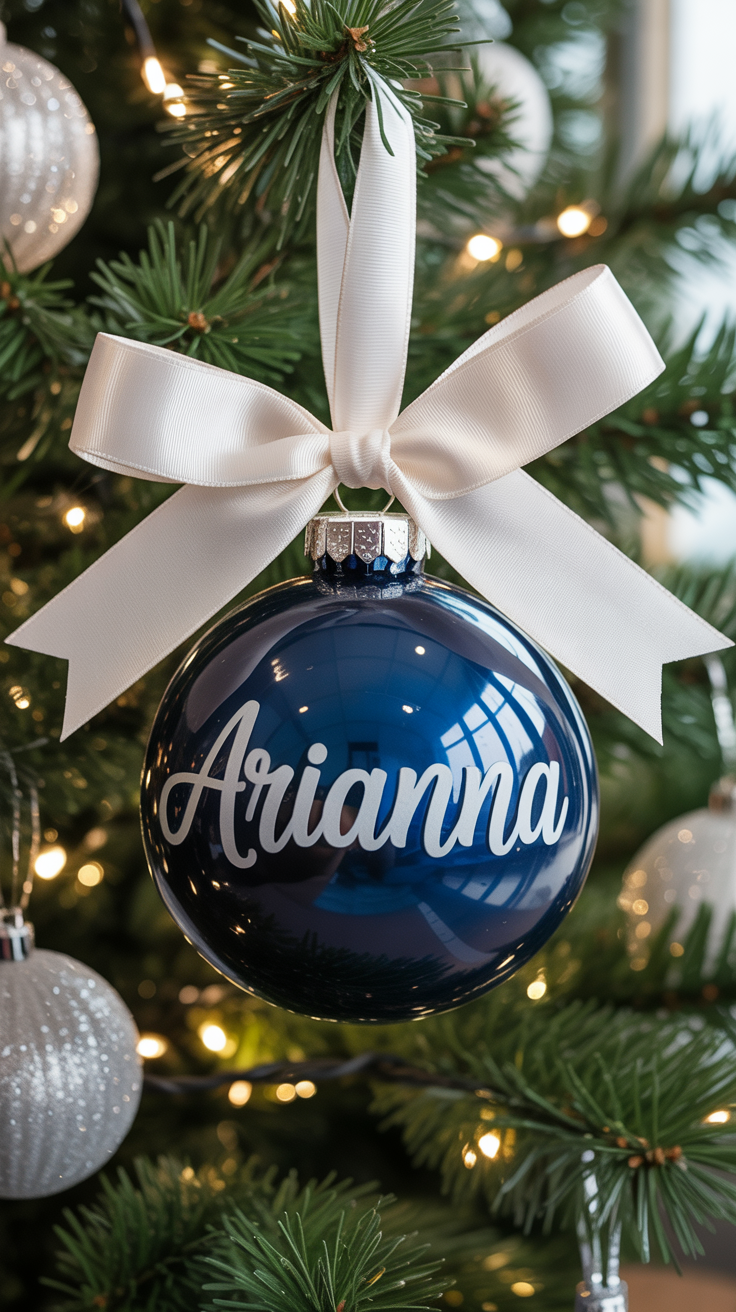

Personalized Vinyl Name Ornaments ✨🎁
Why You’ll Love It
Adding names to your ornaments instantly makes them feel special and luxurious. Personalized ornaments are not only perfect for your own tree, but they also make meaningful gifts for friends and family. With vinyl lettering, even beginners can create a polished, high-end look in minutes.
What You’ll Need
Vinyl sheets or pre-cut stickers
Weeding tool or small tweezers
Ribbon or twine for hanging
Step-by-Step Tutorial
Cut out the name or holiday message from vinyl using scissors or a cutting machine.
Use transfer tape to lift the vinyl letters from the backing sheet.
Carefully place the vinyl onto the ornament and smooth it down to remove air bubbles.
Gently peel off the transfer tape, leaving the design on the ornament.
Add a ribbon or twine to hang your ornament on the tree.
Pro Tips & Variations
Choose metallic or glitter vinyl for a luxe, holiday-ready finish.
Add a small date or year underneath the name for a keepsake ornament.
Use contrasting vinyl colors on painted ornaments for a modern look.
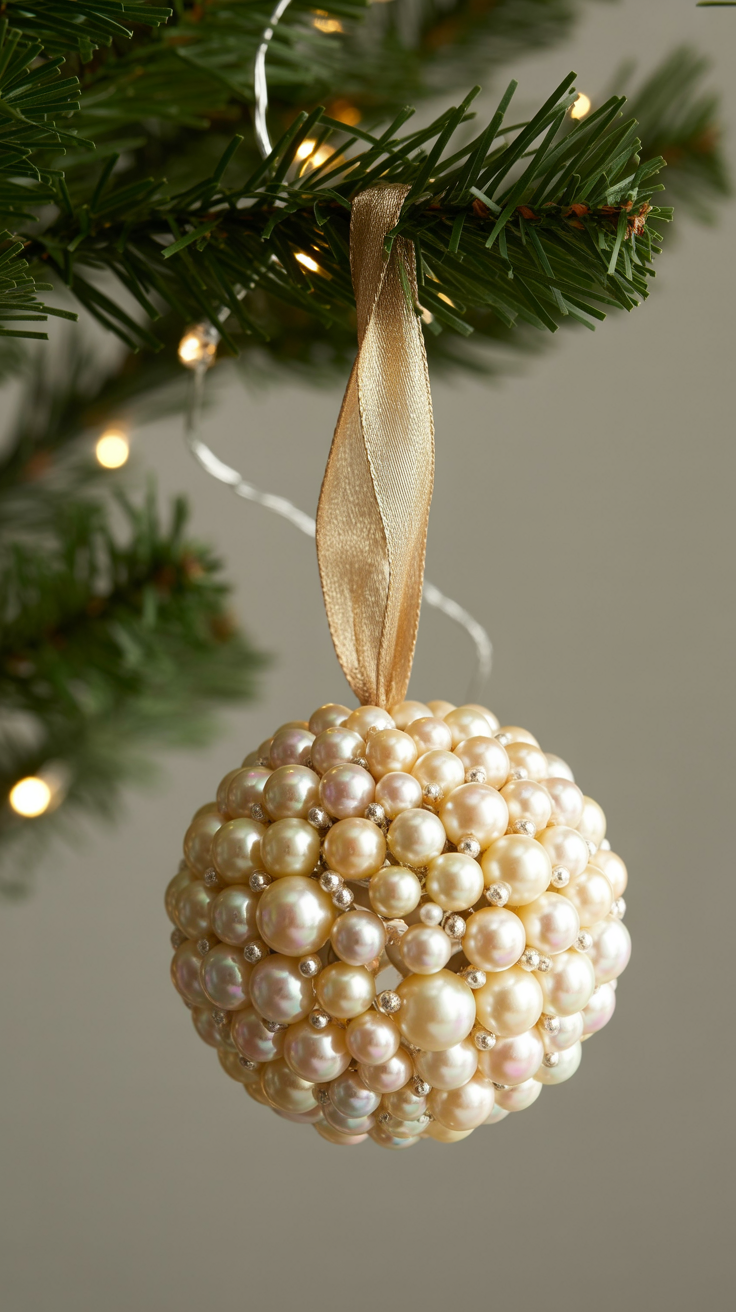
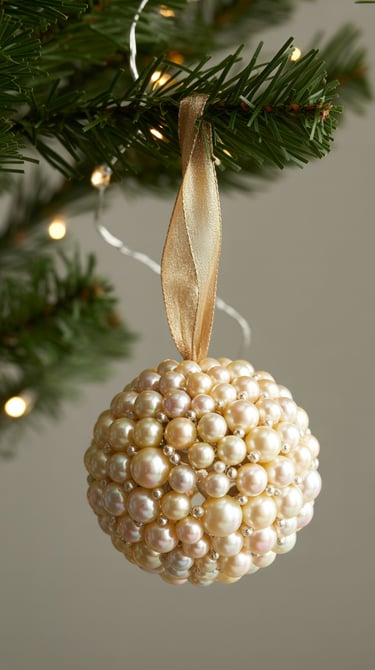
Faux Pearl Ornaments 🦪✨
Why You’ll Love It
Faux pearls give any ornament an instant touch of elegance and sophistication. These ornaments look delicate and expensive, perfect for adding a glamorous, timeless vibe to your Christmas tree. They’re also super versatile—you can make them full-on pearl-covered or just add subtle accents.
What You’ll Need
Faux pearl beads in various sizes
Hot glue gun and glue sticks
Tweezers (optional, for precise placement)
Step-by-Step Tutorial
Begin with a plain ornament and plan your pearl placement.
Using hot glue, attach faux pearls individually or in clusters around the ornament.
Continue until the ornament is covered to your liking.
Let the glue dry completely.
Tie a ribbon or metallic cord at the top for hanging.
Pro Tips & Variations
Mix pearl sizes for added dimension and a more luxurious look.
Alternate with small metallic beads or sequins for extra sparkle.
Create a set with matching colors for a cohesive tree aesthetic.
Metallic Spray-Painted Ornaments ✨🌟
Why You’ll Love It
Metallic spray paint instantly transforms ordinary ornaments into luxe, eye-catching décor. Gold, silver, or rose gold finishes make your tree shimmer like it came straight from a high-end holiday boutique — all for a fraction of the cost. This is one of the easiest ways to achieve a designer look with minimal effort.
What You’ll Need
Metallic spray paint in your favorite color
Disposable gloves and newspaper or a protective surface
Ribbon or metallic cord for hanging.
Step-by-Step Tutorial
Lay down newspaper or a protective surface in a well-ventilated area.
Hold the ornament with gloves or place it on a stand.
Spray a light, even coat of metallic paint over the ornament.
Allow the first coat to dry, then spray a second coat for full coverage.
Once dry, attach a ribbon or metallic cord to hang on the tree.
Pro Tips & Variations
Try combining matte and shiny metallic sprays for a modern, two-tone effect.
Lightly sprinkle fine glitter over the wet paint for extra sparkle.
Use stencils to create patterns or holiday shapes for a custom design.
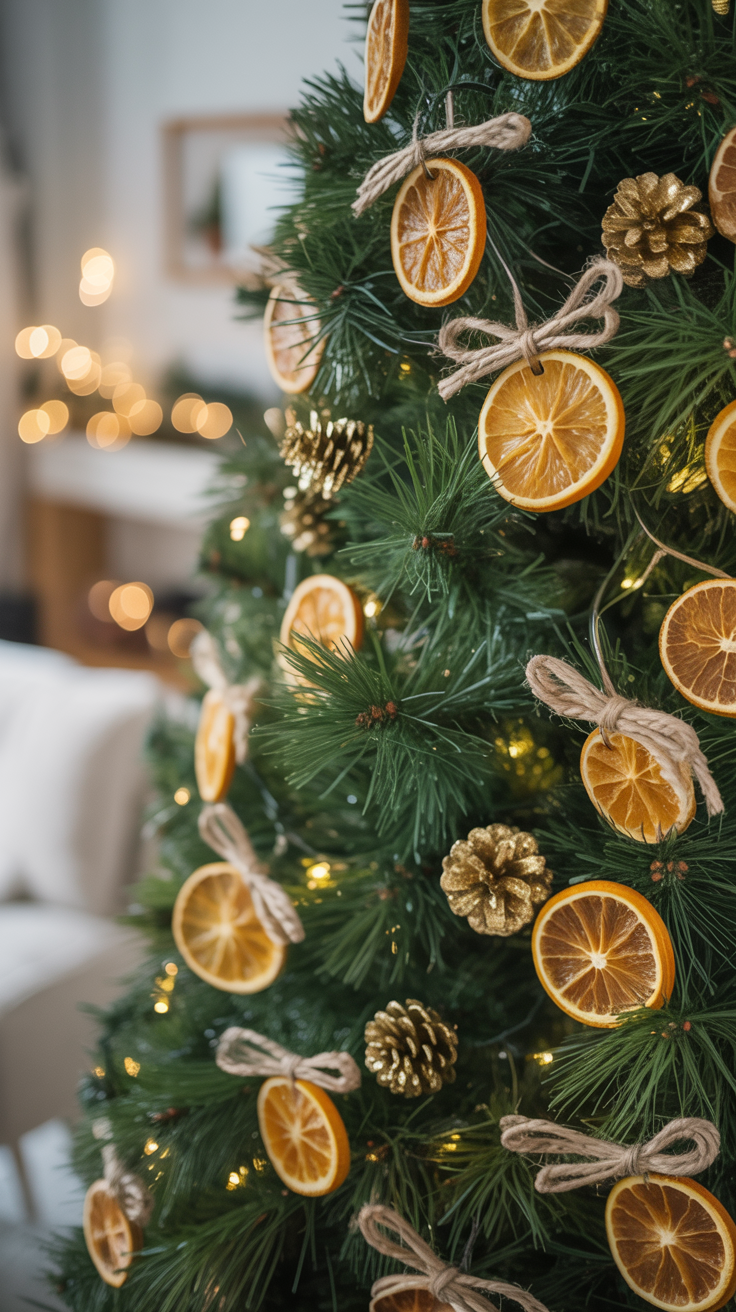

Dried Orange Slice Ornaments 🍊✨
Why You’ll Love It
Dried orange slices add a rustic, natural charm to your tree while filling your home with a subtle, festive scent. These ornaments look expensive and artisanal, perfect for farmhouse or cozy holiday décor. They’re budget-friendly and double as a fun activity to make with kids or friends.
What You’ll Need
Fresh oranges
Oven or dehydrator
Ribbon or twine for hanging
Optional: small cloves or cinnamon sticks for extra detail.
Step-by-Step Tutorial
Preheat your oven to 200°F (90°C).
Slice oranges into 1/4-inch rounds.
Place slices on a parchment-lined baking sheet and bake for 2–3 hours, flipping halfway, until completely dried. (Alternatively, use a dehydrator.)
Let the slices cool completely.
Thread ribbon or twine through the top and tie a loop for hanging.
Optional: press small cloves into the orange or attach a cinnamon stick for added texture and aroma.
Pro Tips & Variations
For a frosted look, lightly brush the dried orange slices with glue and sprinkle with fine glitter.
Combine multiple slices in a small bundle tied together with ribbon for a rustic ornament cluster.
These make beautiful, fragrant gift ornaments for friends and family.
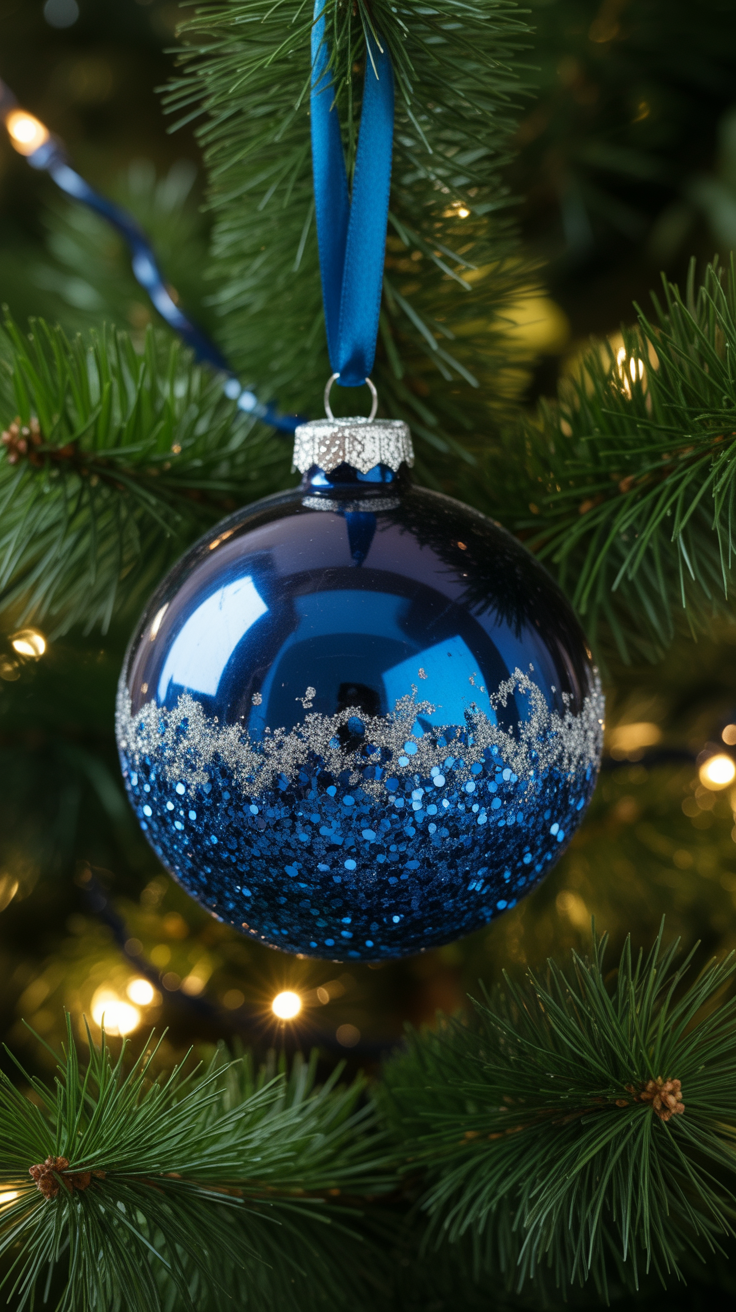
Glitter-Dipped Ornaments ✨🌟
Why You’ll Love It
Glitter-dipped ornaments are a simple way to make your tree sparkle like a luxury display. They catch the lights beautifully and give a festive, glamorous look without breaking the bank. Perfect for adding a touch of magic to any holiday décor.
What You’ll Need
Mod Podge or craft glue
Fine glitter in your choice of color
Small brush or sponge
Ribbon or metallic cord for hanging.
Step-by-Step Tutorial
Use a brush or sponge to apply a thin layer of Mod Podge to the bottom half (or any section) of the ornament.
Sprinkle glitter over the glued area, rotating the ornament to cover completely.
Shake off excess glitter and let it dry completely.
Optional: apply a second layer of Mod Podge over the glitter to seal it.
Attach a ribbon or metallic cord to hang on your tree.
Pro Tips & Variations
Combine glitter with metallic paint for a two-tone luxurious effect.
Use multiple glitter colors for a unique, shimmering design.
Create a set with varying glitter coverage — some fully dipped, some just accented — for a visually interesting tree display.
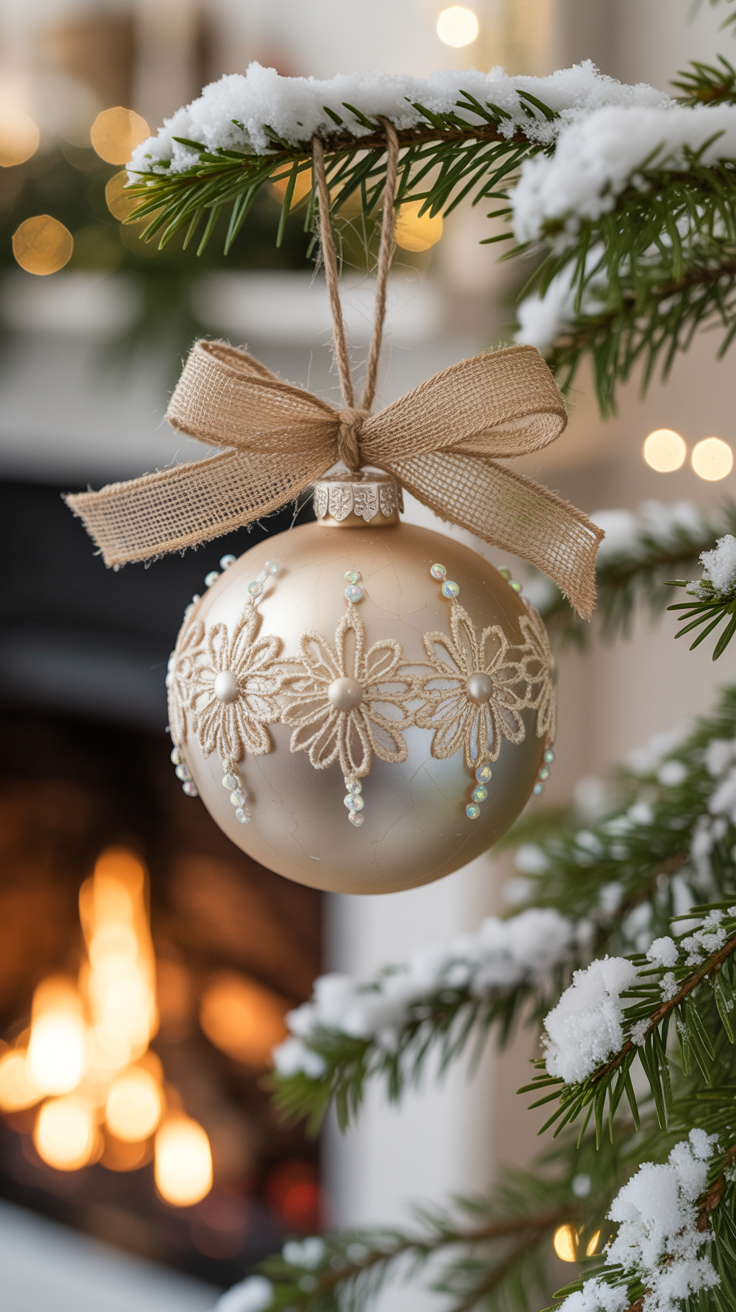

Lace-Wrapped Ornaments 🌸✨
Why You’ll Love It
Lace instantly adds a vintage, romantic feel to your ornaments. Wrapping a simple bauble in delicate lace makes it look like a designer piece while keeping it soft, feminine, and elegant. Perfect for farmhouse, shabby-chic, or classic holiday décor.
What You’ll Need
Lace trim or fabric scraps
Hot glue or fabric glue
Ribbon or twine for hanging
Scissors
Step-by-Step Tutorial
Measure a strip of lace that will wrap around your ornament.
Apply a thin line of glue along the ornament where you want the lace to sit.
Carefully press the lace onto the glue, smoothing it as you go.
Repeat to cover the desired portion of the ornament.
Trim any excess lace and attach a ribbon or twine for hanging.
Pro Tips & Variations
Use white or cream lace for a classic look, or try colored lace for a modern twist.
Layer lace over metallic or painted ornaments for extra depth and elegance.
Add small pearl or rhinestone pins along the lace edge for a luxe touch.


Wood Slice Calligraphy Ornaments ✍️✨
Why You’ll Love It
Wood slice calligraphy ornaments offer a rustic yet elegant touch to your holiday tree. The natural wood provides a warm, farmhouse aesthetic, while the personalized calligraphy adds a sophisticated, custom feel. They’re perfect for celebrating nature and personal style in your holiday décor.
What You’ll Need
Acrylic paint or wood stain
Paintbrushes or foam applicators
Metallic or white paint pens for calligraphy
Ribbon or twine for hanging
Sandpaper (optional, for smoothing edges)
Step-by-Step Tutorial
Prepare the Wood Slices: If desired, lightly sand the surfaces of your wood slices to ensure they are smooth. This will make the painting and calligraphy easier.
Paint or Stain: Apply a thin layer of acrylic paint or wood stain to one side of each slice. Allow them to dry completely. Choose colors that complement your holiday theme.
Add Calligraphy: Using a paint pen, write words or phrases on the painted surface. Common choices include “Joy”, “Peace”, or the recipient’s name. Practice on paper first if needed.
Attach Hanging Materials: Thread ribbon or twine through the hole in each slice and tie a secure knot or bow.
Pro Tips & Variations
Add Glitter: Dust the edges with a bit of glitter while the paint is still wet for a festive sparkle.
Mix Styles: Combine calligraphy with painted designs, like snowflakes or holly, for added visual interest.
Use Stencils: If calligraphy feels daunting, use stencils for letters or designs to ensure perfect results every time.
These ornaments make thoughtful gifts and can be easily customized to suit any holiday aesthetic.

Snow Globe Ornaments ❄️🌟
Why You’ll Love It
Snow globe ornaments capture the magic and wonder of the holidays in a delightful, miniature form. These ornaments bring a sense of nostalgia and charm to your tree, reminiscent of classic holiday snow globes. Customize them with tiny scenes or personal photos for a truly unique and enchanting addition to your décor.
What You’ll Need
Faux snow or glitter
Optional: small photos or keepsakes
Hot glue or adhesive
Ribbon or twine for hanging.
Step-by-Step Tutorial
Assemble the Scene: Choose your miniature figurines or items and arrange them inside one half of the open ornament. Secure them in place with a dab of hot glue.
Add Snow or Glitter: Sprinkle a small amount of faux snow or glitter into the ornament, enough to cover the base of your scene without overwhelming it.
Seal the Ornament: Carefully attach the two halves of the ornament together, ensuring they click securely.
Add Finishing Touches: Tie a ribbon or twine through the top hole for hanging. Optionally, you can add a small bow or charm for extra flair.
Pro Tips & Variations
Personalization: Use a small family photo or memento to create a more personalized ornament.
Theme Choices: Choose seasonal-themed miniatures like tiny Christmas trees, Santa figurines, or even tiny reindeer for added holiday spirit.
Extra Glam: Add a few drops of colored water-safe liquid or glycerin for a more dynamic globe effect.
These snow globe ornaments make for great gifts and keepsakes, perfect for celebrating the cherished moments of the season!
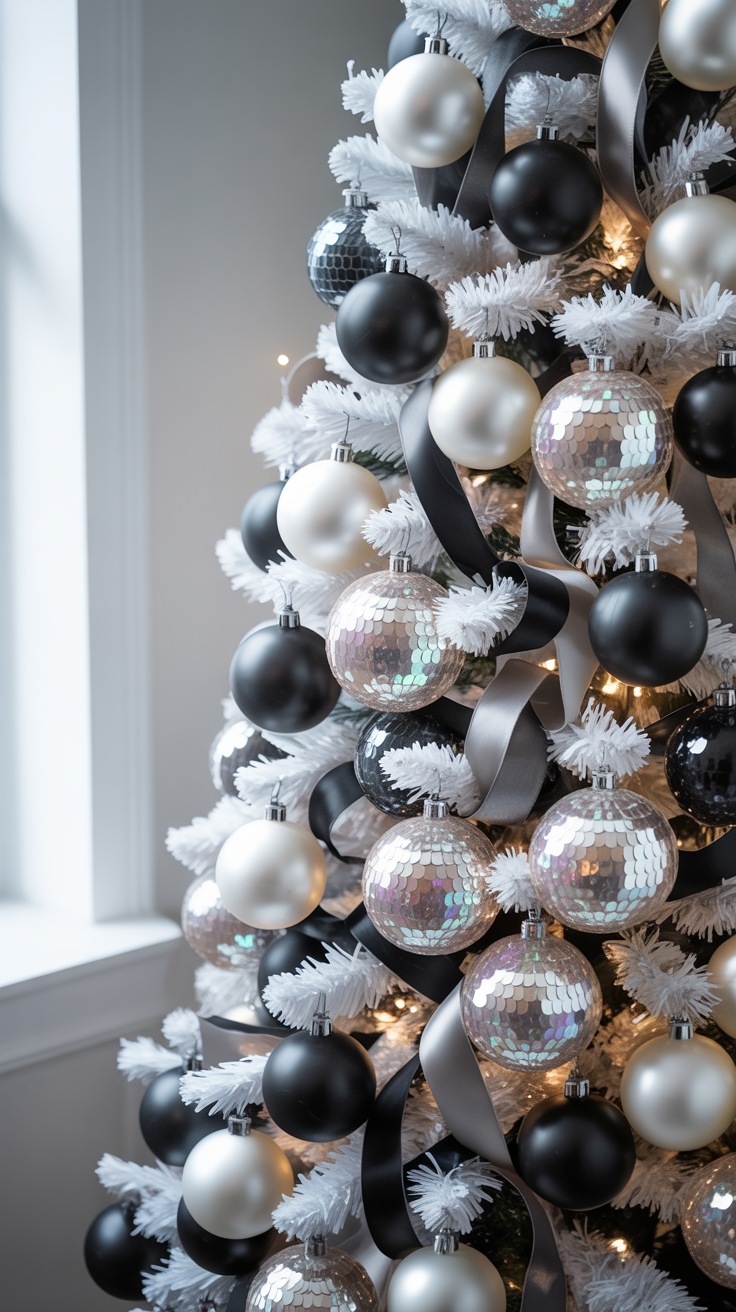

Sequin Ball Ornaments ✨💫
Why You’ll Love It
Sequin ball ornaments add a touch of glamour and shimmer to your holiday tree. Perfect for those who love a bit of sparkle, these ornaments reflect light beautifully and can be customized in a variety of colors to match your holiday theme. They give your tree a festive, designer feel without the hefty price tag.
What You’ll Need
Sequins in your choice of color
Straight pins or a hot glue gun
Ribbon or twine for hanging
Thimble (optional, for pinning)
Step-by-Step Tutorial
Prepare Your Ornament: Start with a plain foam or plastic ball as your base. If desired, you can paint it in a shade that matches your sequins for extra depth.
Attach Sequins: Using a straight pin, thread each sequin and press it into the foam ball. Alternatively, use a hot glue gun to affix each sequin onto a plastic ball, overlapping slightly to ensure full coverage.
Cover Entire Surface: Continue until the entire ornament is covered in sequins, ensuring an even distribution for a lustrous appearance.
Finish and Hang: Attach a ribbon or twine to the top of the ornament for hanging.
Pro Tips & Variations
Mix Colors: Use a combination of sequin colors for a unique, ombre effect or holiday-specific themes.
Pattern Creation: Create patterns like spirals or stripes by alternating sequin colors strategically.
Extra Chic: For a more luxurious result, use metallic or holographic sequins that catch the light in different ways.
These sequin ball ornaments are perfect for adding sparkle to your tree and make great personalized gifts!
final thoughts
🎄✨ Wow, what a festive ride through the world of DIY Christmas ornaments! With just a sprinkle of creativity and a few affordable supplies, you can transform your holiday décor into something that looks like it belongs in a luxury boutique—all without breaking the bank.
Whether you’re into the rustic charm of dried orange slices or the chic sparkle of sequin balls, these ornaments are designed to fit every style. The best part? They’re as fun to make as they are beautiful, turning each crafting session into a moment of holiday magic.
So grab your supplies, invite some friends over, and make it a crafting party! With these ideas, your tree, and your holiday spirit, will be shining bright. Happy decorating, everyone! 🌟