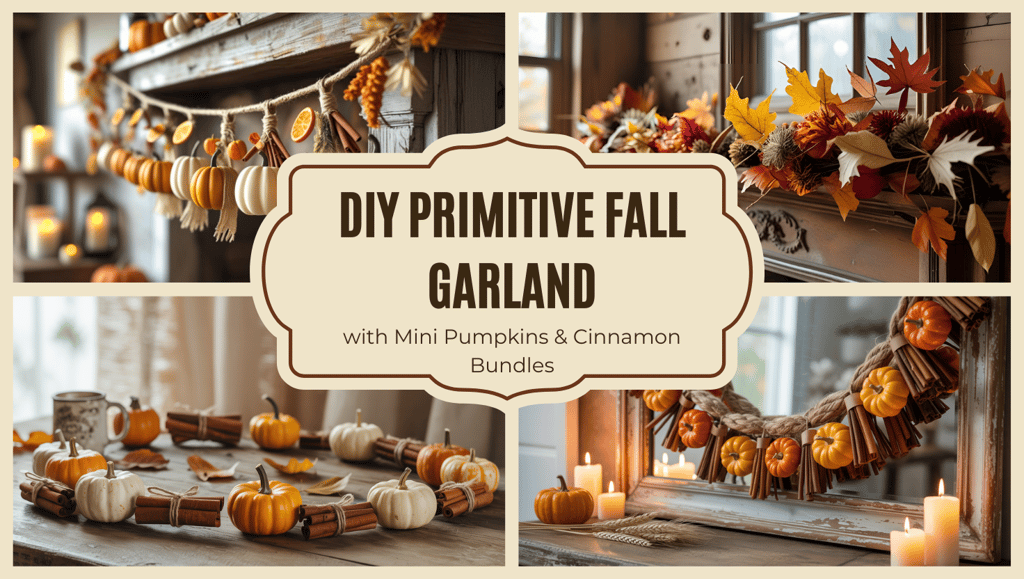
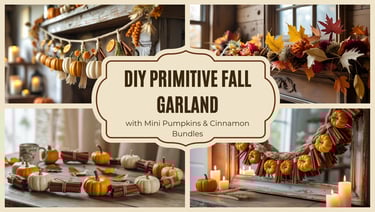
DIY Primitive Fall Garland with Mini Pumpkins & Cinnamon Bundles
"🍁 Create a cozy, handmade primitive fall garland with mini fabric pumpkins, cinnamon bundles, dried oranges & rustic charm! Perfect for farmhouse autumn vibes 🧡✨"
HOLIDAYS AND SPECIAL OCCASSIONS
DIY Primitive Fall Garland with Mini Pumpkins & Cinnamon Bundles
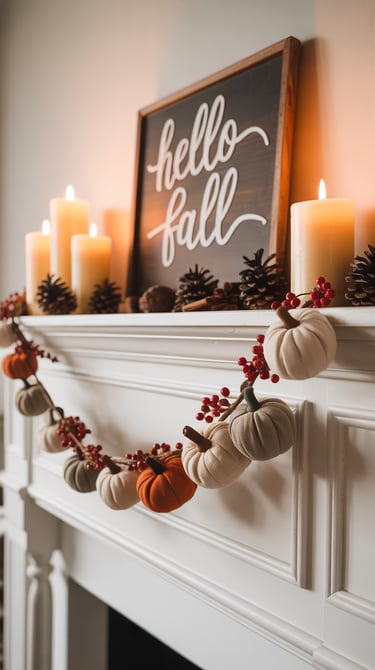
There’s just something magical about fall, isn’t there? 🍂 The air gets crisp, the scents get warmer, and suddenly, your home is craving a little rustic charm. If you’re anything like me, you live for that primitive, handmade vibe that makes everything feel extra cozy and inviting. This DIY Primitive Fall Garland with mini pumpkins and cinnamon bundles is the perfect touch for mantels, shelves, or even draped along your entryway. Think farmhouse meets woodland magic—with the sweet scent of cinnamon dancing in the background. 😍 Best part? It’s so simple to make, and it’ll instantly give your space that heartwarming, homespun feel we all love this time of year. Ready to get crafting, amiga? Let’s make something beautiful together!
This post contains affiliate links. If you make a purchase through these links, I may earn a small commission at no additional cost to you. Thank you for supporting my blog!
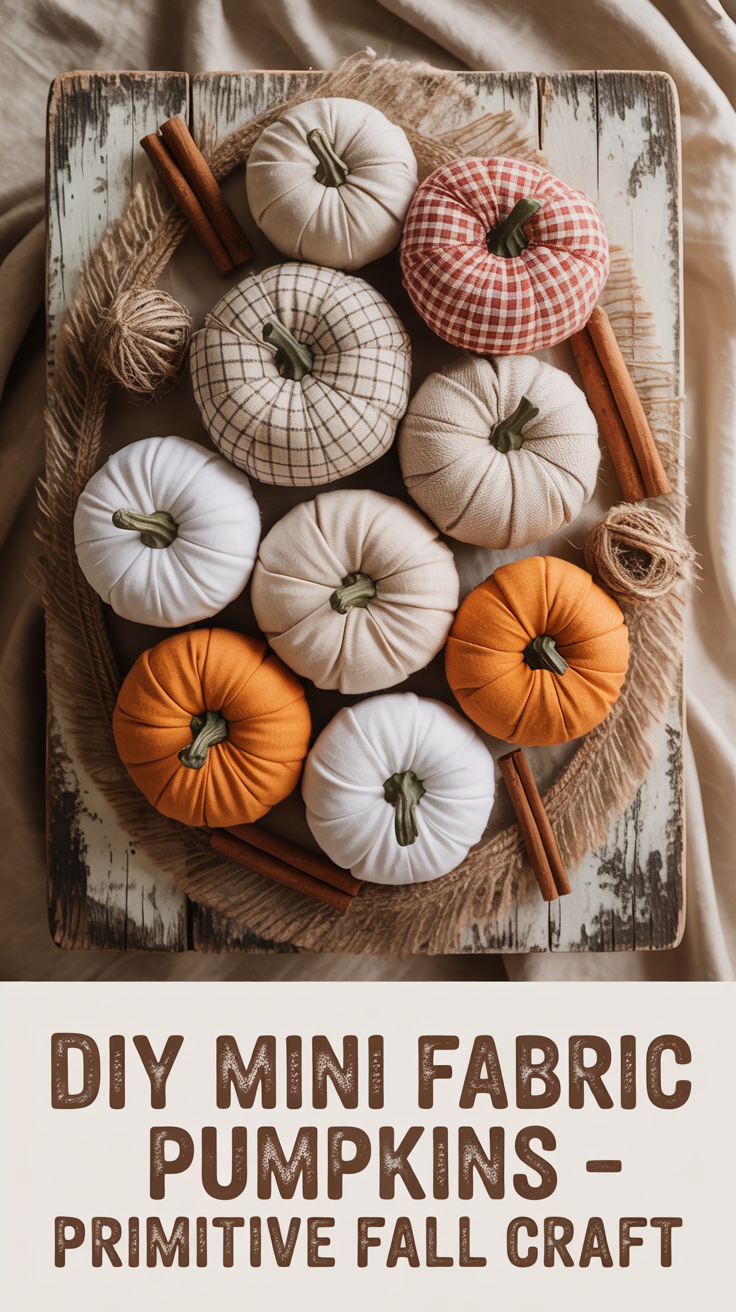
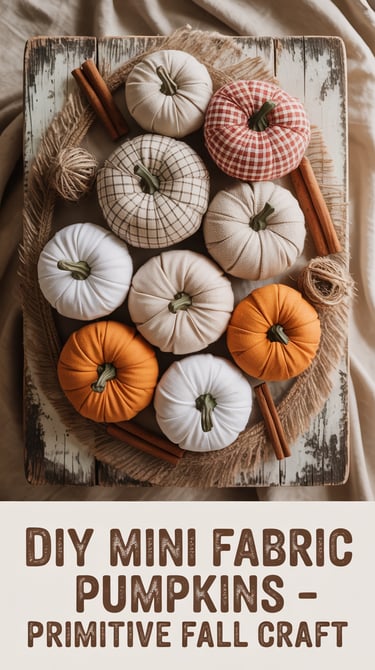
🎃 How to Make Mini Fabric Pumpkins (Primitive & Adorable!)
Let’s start with the heart of this garland—the mini pumpkins! These little cuties bring that primitive charm to life with their soft textures and earthy tones. Whether you go for tea-stained muslin, plaid flannel, or even scrap fabric from old shirts, the key is keeping it cozy, simple, and a little worn-in. They’re the kind of handmade touch that feels like a warm hug straight from grandma’s fall kitchen. And guess what? You don’t even need to sew (unless you want to)! Let’s dive in:
✂️ What You’ll Need:
Optional: Distress Ink Pads
🧵 Step-by-Step Instructions:
Cut Your Fabric
Choose your favorite primitive-style fabric and cut out a circle (use a bowl as a guide!). The size of the circle will determine the size of your pumpkin.Stitch or Glue Around the Edge
Use a running stitch around the edge of your circle—don’t worry about it being perfect. If you’re going no-sew, add a thin line of hot glue near the edge and gently gather it as it dries.Stuff It Up!
Add a bit of polyfill stuffing into the middle—enough to make it plump but still soft. Once stuffed, pull your thread (or pinch the glued edges) to close it up. Tie it off securely.Add Pumpkin Ridges
Use a long piece of jute twine or thread. Wrap it around your pumpkin, pulling tight to create those natural “pumpkin sections.” Wrap 4–6 times, crossing at the center each time, then tie it off at the bottom.Glue on the Stem
Hot glue a cinnamon stick or twig right on top—it’s the perfect finishing touch. You can even wrap the base of the stem with a bit of twine for extra texture.Optional Aging Touches
If you want that weathered, primitive look, lightly dab your pumpkin with distress ink . Let it dry fully before using in your garland.
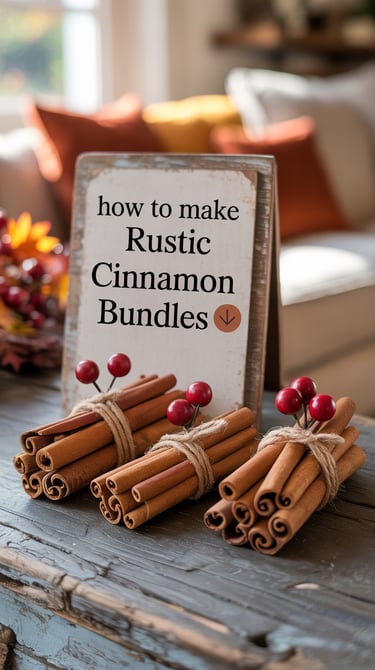
🍁 How to Make Cinnamon Stick Bundles (Rustic Scented Charm!)
Nothing says fall quite like the warm, spicy scent of cinnamon. These adorable little bundles are the perfect primitive touch for your garland—and they smell absolutely heavenly. ✨ Whether you tuck them between your pumpkins or let them dangle freely, they add texture, fragrance, and that authentic farmhouse vibe we all adore. Plus, they’re so easy to make and only take a few minutes. Let’s bundle up!
✂️ What You’ll Need:
🪵 Step-by-Step Instructions:
Create the Bundle
Take 3 cinnamon sticks and stack them in a criss-cross pattern (you can go straight or staggered). Use a dab of hot glue between them if you want them extra secure.Wrap with Twine
Tie a piece of Jute Twine around the center of the bundle and make a cute little bow. Leave the ends long and frayed for that primitive, handmade look.Add a Touch of Fall (Optional)
If you want to go the extra mile, tuck in a tiny faux leaf or mini berry sprig under the bow using a bit of glue. This adds a little pop of color and texture.Let It Set
Give it a few minutes to dry and set fully before adding it to your garland.
These sweet-smelling bundles are so simple and rustic—you’ll want to make extras for your wreaths, centerpieces, or even as cute napkin ties for a fall tablescape. Trust me, amiga, once you start, you’ll be obsessed!

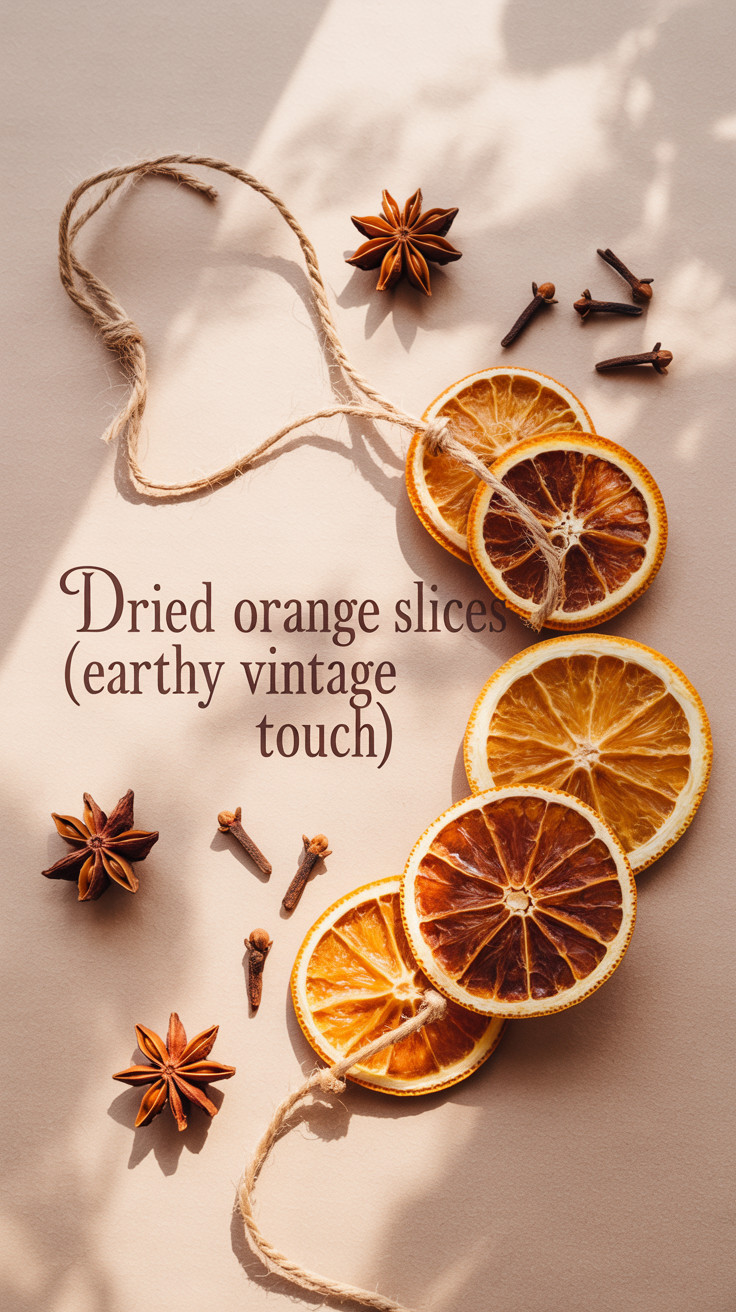
🍊 How to Use Dried Orange Slices (Earthy Vintage Touch!)
Dried orange slices are that sweet little detail that makes everything feel extra homemade. The warm orange glow pairs beautifully with the browns and creams of primitive fall style. Bonus? They smell amazing and last for months!
✂️ What You’ll Need:
Dehydrator for Fruit (if you want to make your own)
Optional: Star Anise or Cloves for Scent Accent
🍊 Step-by-Step Instructions:
Buy or Make Dried Oranges – Use this pack or dry thin slices in your oven/dehydrator.
Punch a Hole at the top using a craft needle or skewer.
String with Twine – Thread it through using thin jute and tie in place.
Add a Clove or Star Anise with a dab of glue for a beautiful finish.

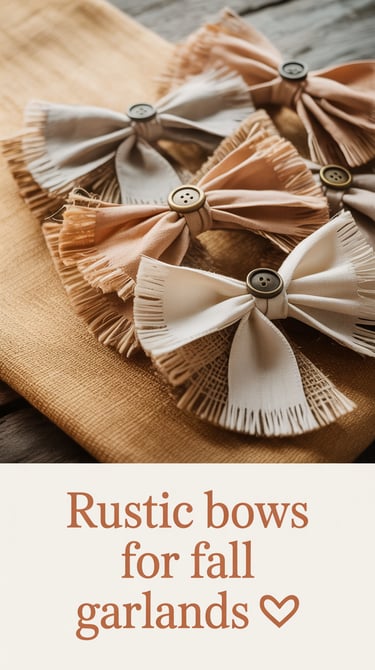
🎀 How to Make Burlap or Muslin Bows (Rustic Finishing Touch)
These soft, frayed bows bring texture and warmth to your garland without overpowering it. They help fill in little gaps and add that perfect “handmade with love” feel.
✂️ What You’ll Need:
Optional: Mini Safety Pins
🎀 Step-by-Step Instructions:
Tie a Simple Bow and pull gently to fray edges.
Secure With Glue or use mini safety pins to attach to the garland.
Optional Accent: Add a wooden button or tiny faux leaf to the center.

🪵 How to Add Rustic Beads or Wooden Buttons (For Texture & Space)
These small filler pieces bring balance to your garland and help tie the entire look together. They’re perfect for spacing between pumpkins, bundles, and bows without overwhelming your design.
✂️ What You’ll Need:
🌾 Step-by-Step Instructions:
Thread Your Beads using thin twine or thread.
Alternate Beads & Buttons between bigger items on the garland.
Add a Dab of Glue to secure in place, or leave loose for movement.
Use Varying Sizes to keep the look primitive and natural.


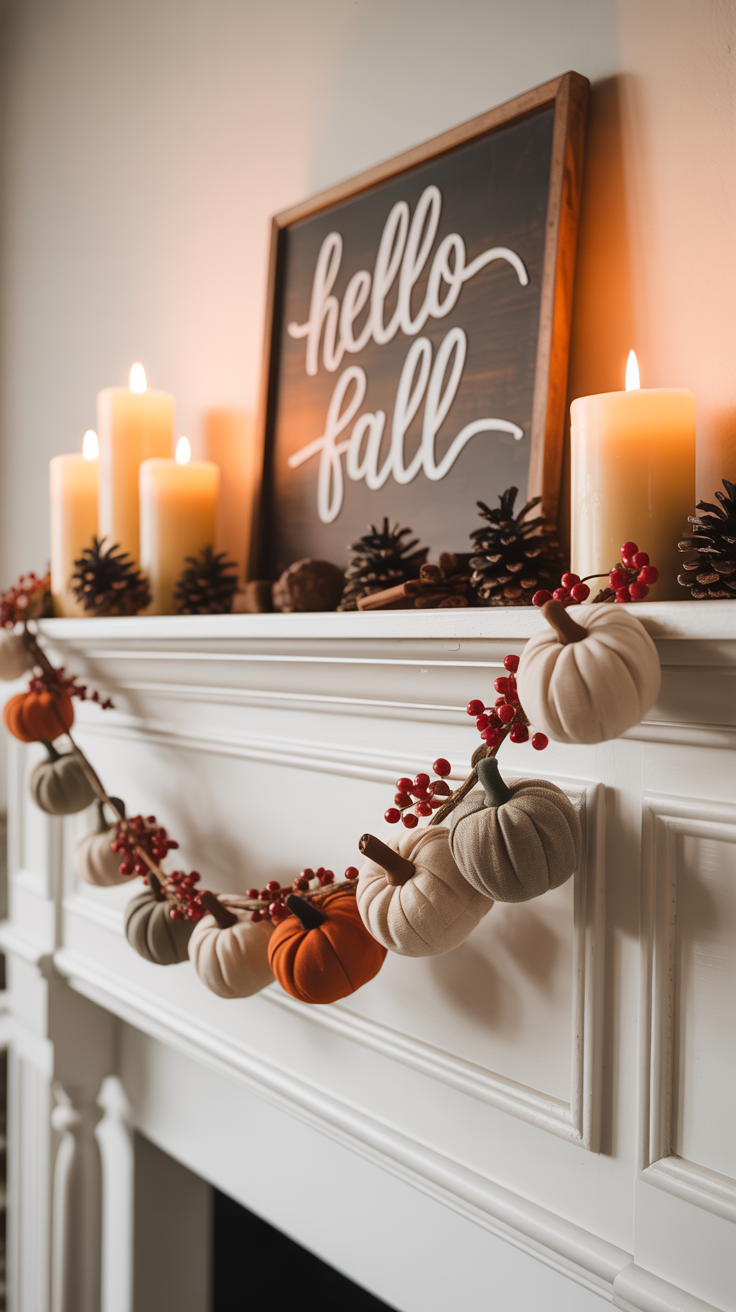
🧶 Assembling It All: Your Garland Base
Now that all your charming pieces are ready, it’s time to bring everything together. This part is so satisfying—you’ll see your garland come to life with each little element!
✂️ What You’ll Need:
Thick Jute Twine or Rustic Rope – about 4 to 6 feet long
or Floral Wire – optional for attaching pieces
🧶 Assembly Steps:
Lay Out All Elements – Before gluing, space everything out on a table or floor.
Start in the Center and work outward for balance.
Glue or Tie Each Piece to your jute garland base.
Mix Textures – Alternate pumpkins, bundles, bows, oranges, beads, etc.
Let It Dry fully before hanging. Add extra glue where needed.
FINal Thoughts
This primitive fall garland is more than just a decoration—it’s a feeling. 🍂 A little bit homespun, a little bit spicy, and a whole lot of cozy charm. Whether you hang it over your mantel, wrap it around a banister, or style it on a shelf, it’ll bring warmth, texture, and that handmade magic into your home. 💛