From Pinterest to Reality: Success Tips for Creating Picture-Perfect Yarn Pumpkins 🎃🧶
Turn your Pinterest dreams into cozy reality! Learn how to create yarn pumpkins with this step-by-step guide — beginner-friendly, budget-approved, and totally adorable!
HOME & LIFESTYLE

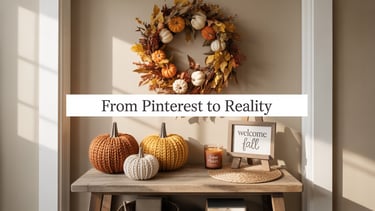
Yarn pumpkins are having a major moment — and honestly, we’re here for it! These little cuties are everywhere on Pinterest, styled on mantels, tablescapes, and cozy fall corners. The best part? You can make them yourself in under 20 minutes with just a few supplies. 🧡
Whether you're into farmhouse neutrals, boho textures, or vibrant autumn tones, yarn pumpkins are a dreamy DIY that fits any fall aesthetic — without breaking the bank. This post contains affiliate links. If you make a purchase through these links, I may earn a small commission at no additional cost to you. Thank you for supporting my blog!
Why Yarn Pumpkins Are the Star of Fall Decor 🍂
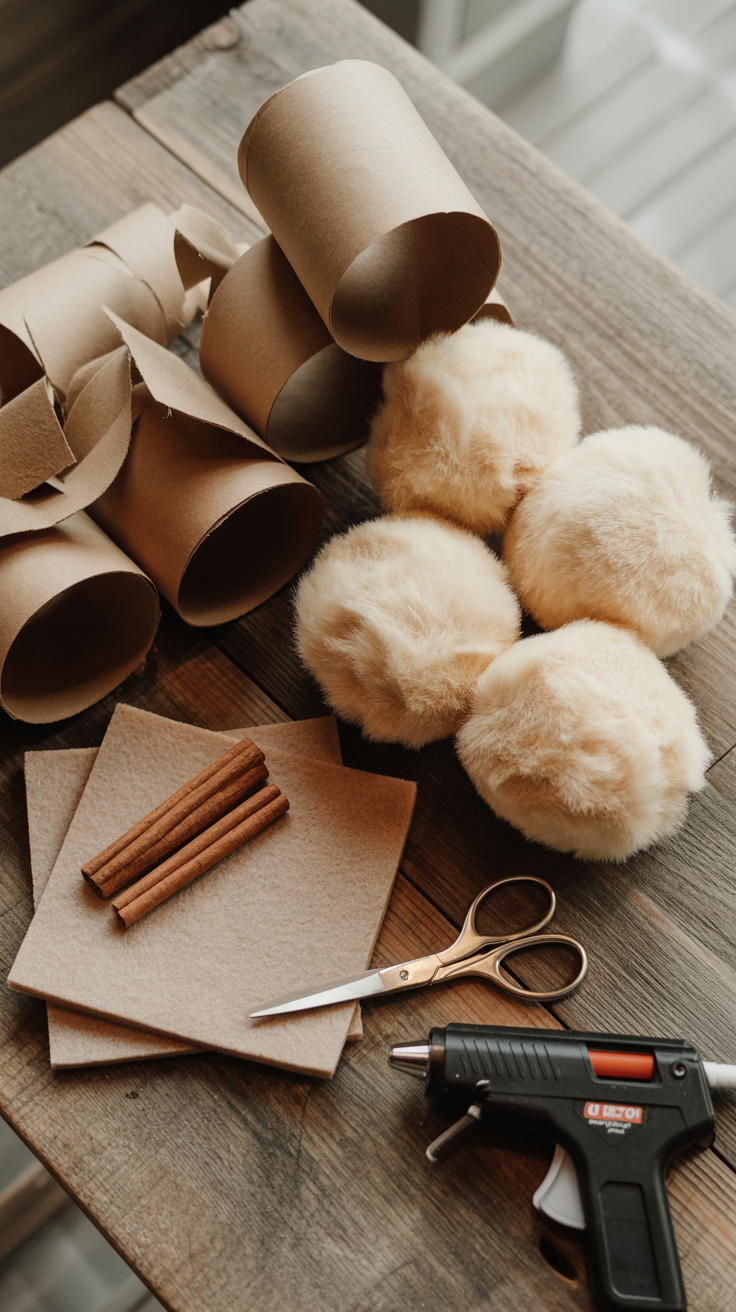
Before you get your glue gun ready, here’s a list of what you’ll need to craft your own Pinterest-worthy yarn pumpkins:
Chunky yarn in fall colors (like terracotta, mustard, ivory, or burnt orange)
Best-Selling Chunky Yarn BundlePipe cleaners – green for stems, brown for vines
Plastic foam balls or rolled-up cardstock (acts as the pumpkin base)
Hot glue gun + glue sticks
Budget Hot Glue Gun Starter KitScissors
Mini faux leaves or jute twine bows for decoration
Supplies You’ll Need 🛒

✨ Step-by-Step Guide: How to Make Yarn Pumpkins Like a Pinterest Pro
🎃Step 1: Gather Supplies
Collect everything you'll need before starting. Choose yarn in your favorite fall shades — think pumpkin orange, creamy white, mustard yellow, or even soft sage green for a modern twist. Pipe cleaners will form your whimsical stems and curly vines.
Pro Tip:
Chunky or boucle yarn gives your pumpkin that cozy, plush look we all love from Pinterest inspo!
Let’s get crafty! Follow these simple steps to turn basic supplies into adorable handmade pumpkins you'll be proud to show off.

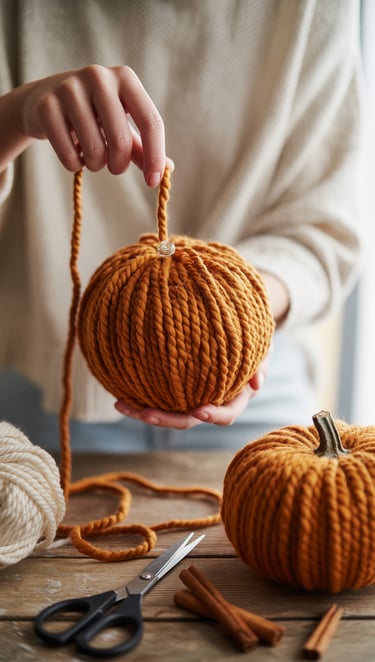
✂️ Step 2: Wrap the Base
Start by securing the end of your yarn to the foam ball or rolled cardstock base with a small dab of hot glue.
Now wrap the yarn all the way around the base until it's completely covered. Don’t worry if it’s not perfect — the more natural and soft the texture, the cuter the pumpkin!
Wrap tighter for a slimmer pumpkin
Wrap loosely and layer for a plump, cozy one
Make sure the base is fully hidden beneath the yarn.
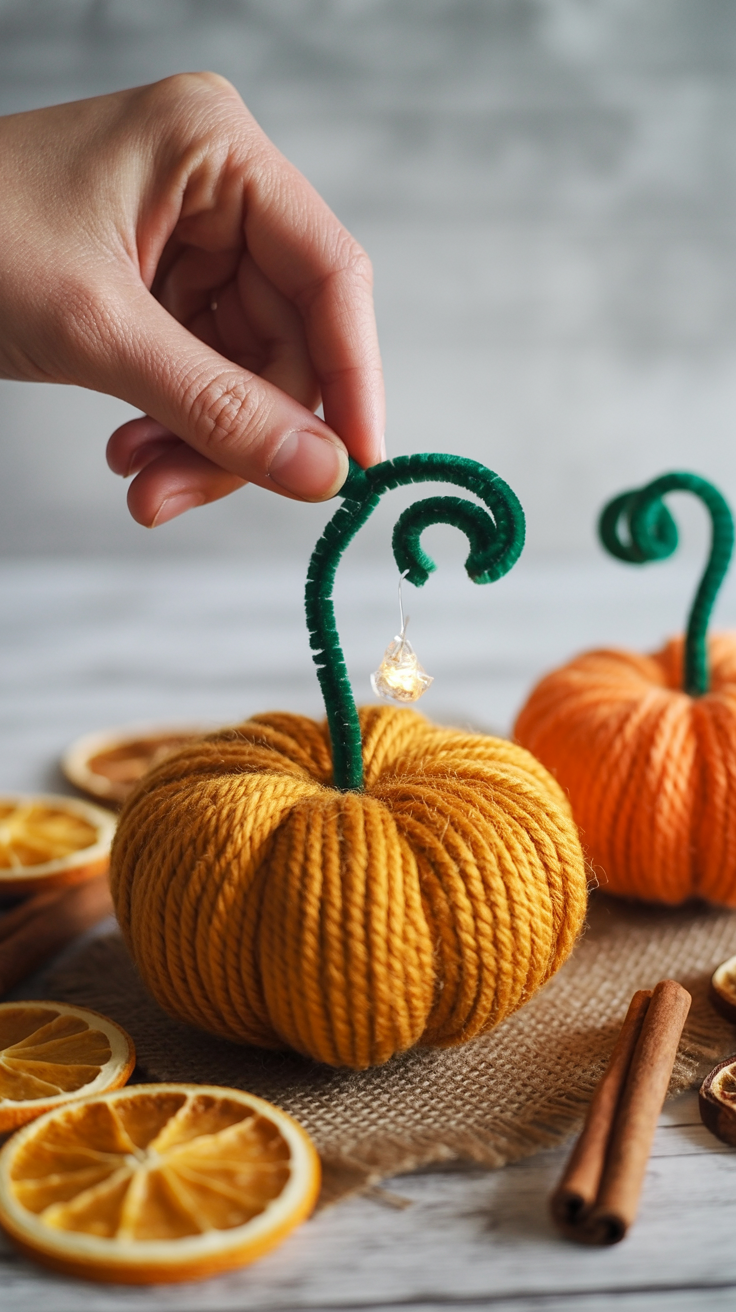

🌿 Step 3: Add Stems & Tendrils
Time to bring it to life! Twist a green pipe cleaner into a little curly “stem” and attach it with a dab of glue to the top of your pumpkin.
Want more whimsy? Use a brown pipe cleaner to create a curly vine. Just wrap it around a pencil, slide it off, and glue it near the stem.
Optional Detail: Add a tiny faux leaf next to the stem or a little bow made of jute twine for extra charm.
✨ Step 4: Finishing Touches
Now fluff out the yarn slightly with your fingers to create texture and volume. You can even trim a few strands to even out the shape.
Arrange your pumpkins together with cozy accents like candles, pinecones, or acorns for a Pinterest-perfect display.
Picture This:
A trio of yarn pumpkins in warm tones sitting on a wooden tray with fairy lights, a plaid blanket, and a cup of pumpkin spice tea beside them. 🍁📸

🍂 Where to Display Your Yarn Pumpkins (And Exactly How to Style Them)
How-To Style It:
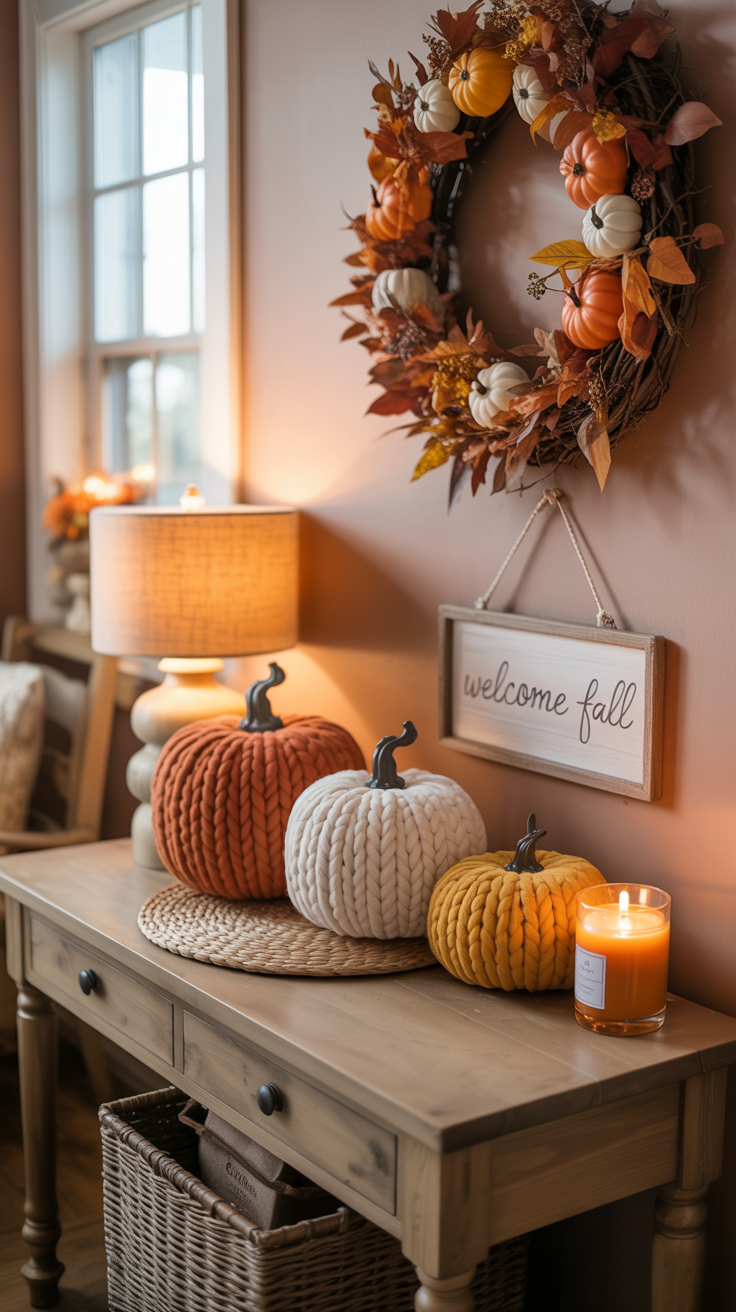
Start by hanging or propping up a fall wreath behind your table setup as a backdrop. Choose one with dried leaves, mini pumpkins, or soft pampas grass for that natural vibe. Then, place 2–3 yarn pumpkins of different sizes directly on the table surface.
Surround them with:
A few fall-scented candles (like pumpkin spice or cinnamon vanilla)
A small wooden sign or quote block
A tray or woven placemat to anchor the grouping
Pro Tip: Use varying heights — stack a pumpkin on a small riser or book for dimension!
Yarn pumpkins aren’t just adorable — they’re versatile! Whether you're creating a warm welcome or styling a fall centerpiece, here's how to bring those soft little pumpkins to life around your home:
🏡 1. Entryway Table with a Fall Wreath and Scented Candles
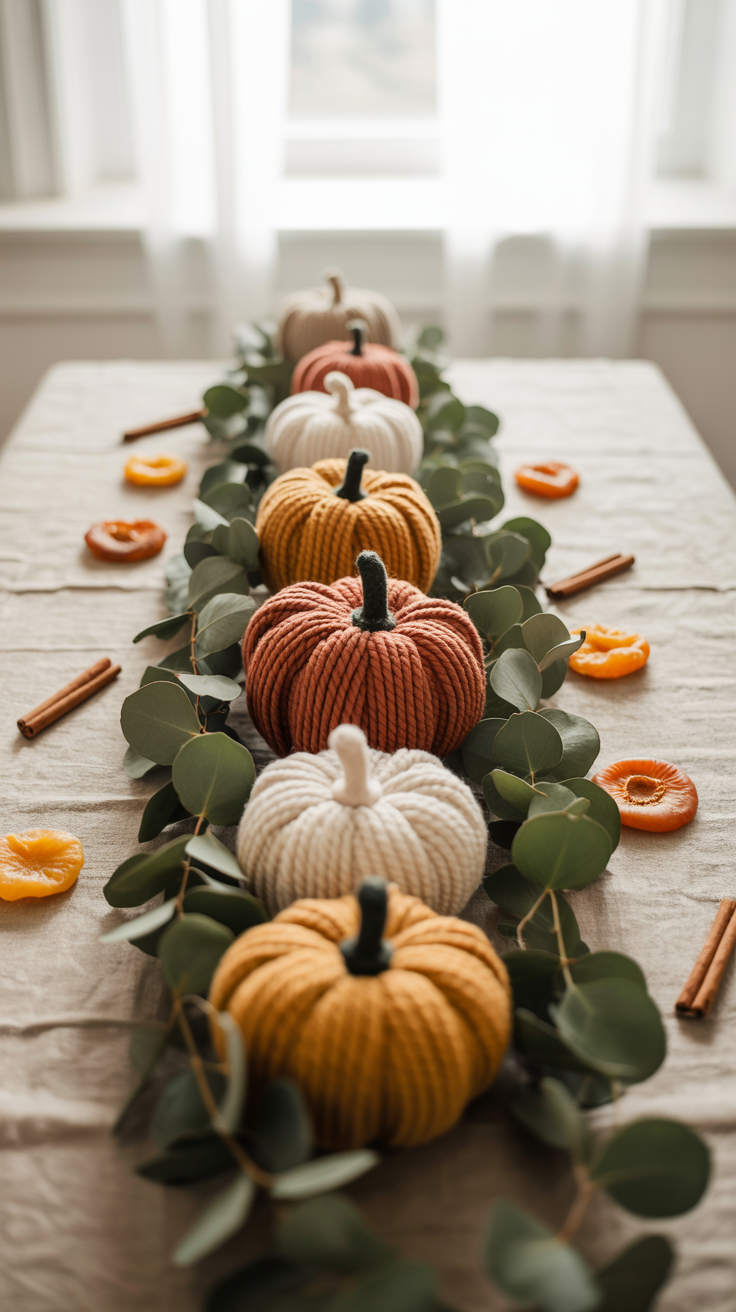

🍽️ 2. Dining Table Centerpiece with Eucalyptus Leaves
How-To Style It:
Lay down a neutral table runner (think burlap or ivory linen). In the center, layer soft faux eucalyptus garlands across the length of the table. Then nestle in 3–5 yarn pumpkins in alternating colors (like rust, mustard, and cream).
Add:
Tea lights in mason jars or glass holders
Scattered pinecones or acorns
Optional: mini name cards or place settings for guests
Pro Tip: Stick with an odd number of pumpkins for a natural look, and use soft lighting during dinner for extra coziness.
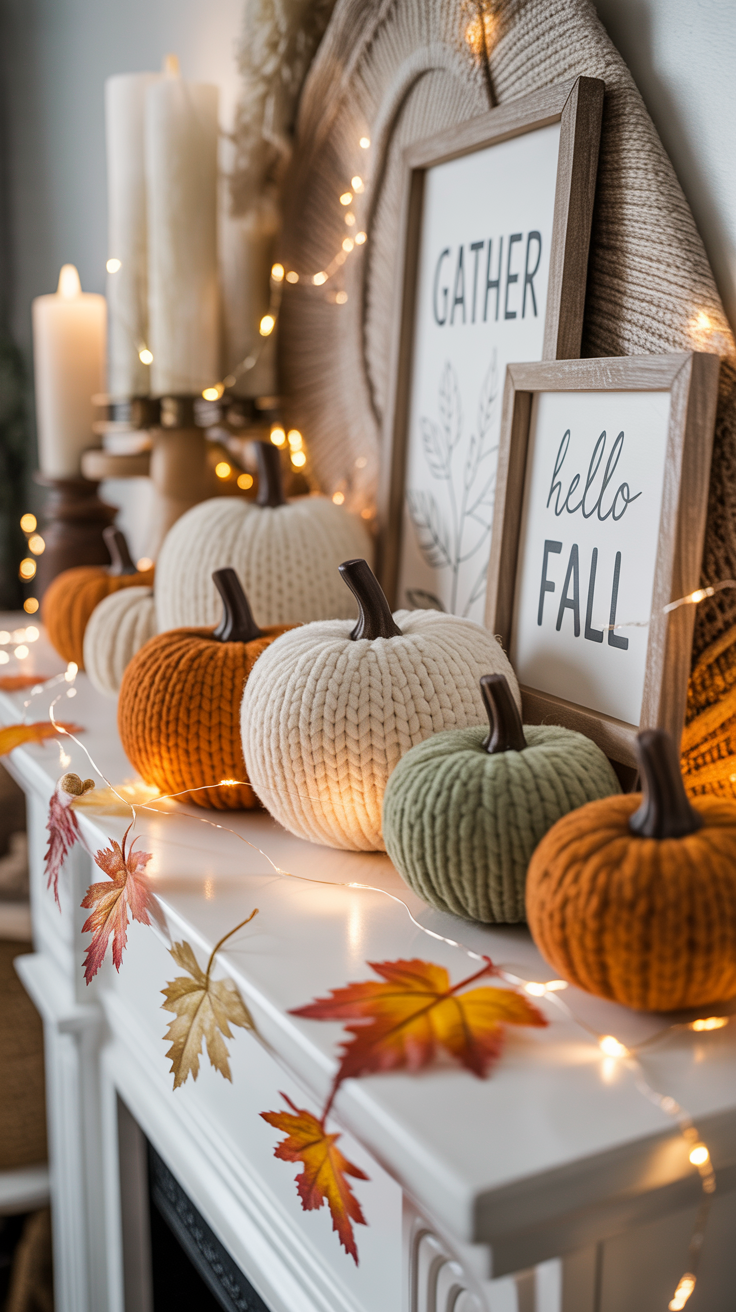

🔥 3. Shelf or Fireplace Mantel with Mini Signs and Twinkle Lights
How-To Style It:
First, drape a strand of fairy lights or fall garland along the edge of the shelf or mantel. Add 2–4 yarn pumpkins in different sizes and group them in sets of two for balance.
Intersperse with:
Mini wooden signs (like “hello fall” or “gather”)
Faux fall leaves or beaded garlands
A vintage lantern or candle for ambiance
Pro Tip: Keep your color scheme consistent (neutrals, all warm tones, or all pastels) so everything looks intentional and cozy.
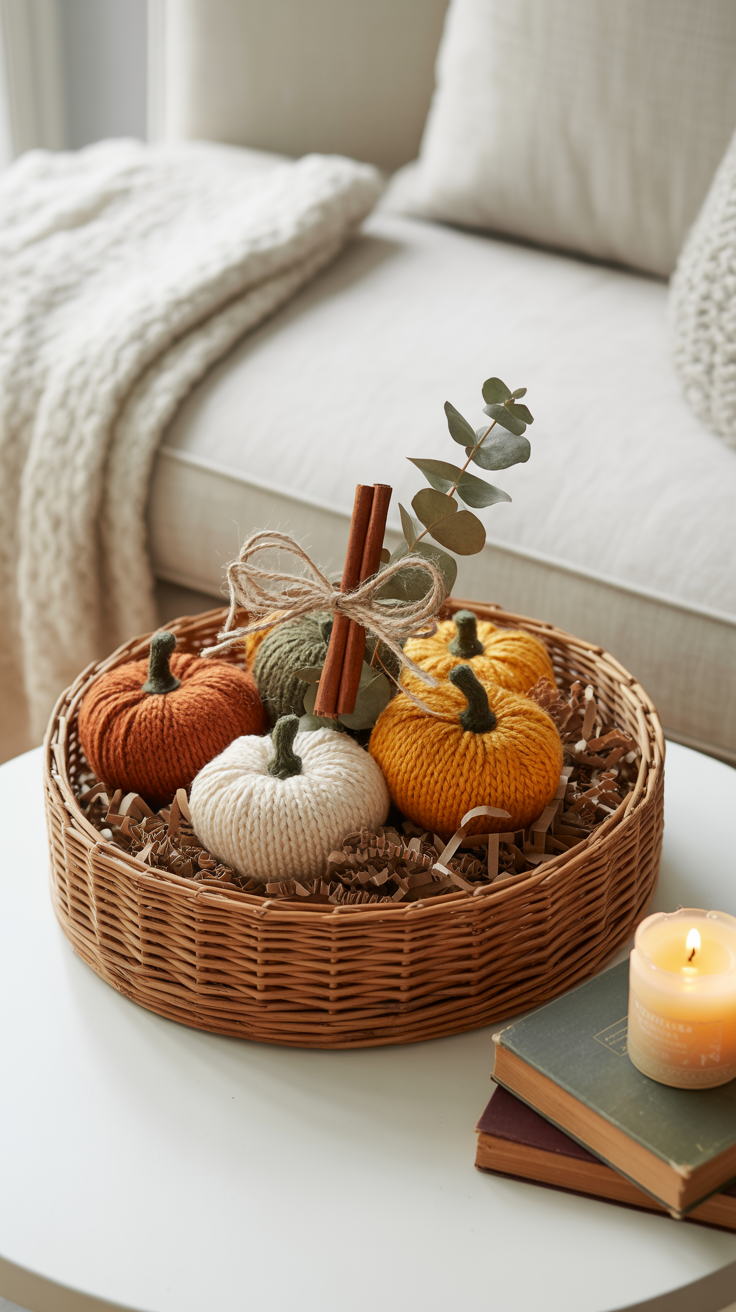

🛋️ 4. Coffee Table Basket or Bowl for That Effortless Cozy Vibe
How-To Style It:
Grab a shallow wooden bowl, wicker tray, or ceramic dish and line the bottom with shredded paper filler, faux moss, or a soft fabric scrap. Then gently place 3–5 yarn pumpkins inside.
Tuck in:
A few dried florals or cinnamon sticks
A jute bow or mini fall tag
Optional: a small pumpkin-shaped candle or fall mug nearby
Pro Tip: Place the tray next to a book stack, cozy throw, or vase of pampas grass for a full lifestyle look.
Pro Styling Tips for Pinterest-Worthy Results 📸
✅ Mix yarn textures: Use velvet, boucle, and jute for a luxe layered effect
✅ Stick to a color palette: Neutrals, pastels, or jewel tones
✅ Add natural elements: Faux leaves, acorns, twine bows, or even cinnamon sticks
Most Common Mistakes to Avoid (So Yours Don’t Look Like a DIY Fail 😅)
🚫 Using yarn that unravels or sheds
🚫 Forgetting to glue down the starting end
🚫 Skipping the fluffing step (it gives volume and shape!)
🚫 Choosing bright clashing colors that don’t match your fall theme
Shop the Essentials 🛒 (Affiliate Picks)
final thoughts
At the heart of every Pinterest-worthy yarn pumpkin is something even more beautiful — your creativity. Whether you’re crafting a few to warm up your living room or making a whole patch for your holiday table, these soft little pumpkins bring comfort, charm, and a whole lot of heart into your home.
Don’t worry about making them perfect — embrace the fluff, the whimsy, and the joy of handmade fall decor. 🍁✨ Every twist of yarn and curl of a pipe cleaner reflects your style, your vibe, and the love you pour into your space.
So light that candle, put on your favorite cozy playlist, and enjoy the process. Because turning pins into reality isn’t just about decorating — it’s about creating little moments of magic 🧶💛